
10 Basic Baking Tools for Beginner Bakers
Not sure where to start? Here's my essential beginner baker's kit.

If you’ve recently discovered the beautiful world of baking and want to get started with your first recipes, you’re probably wondering a lot about baking equipment. There are so many baking tools out there that deciding on which ones to get (and at which price point) can be a bit overwhelming, especially for the beginner baker.
I’m going to be honest: more than once in my baking life have I gone out and bought something I saw someone use in a video or recipe, just to find it sinking to the bottom of a kitchen drawer until (much later) the time had finally come to actually use it. I also have some equipment from my time in culinary school that I have barely touched since (my very old-school pastry crimper comes to mind immediately). All that to say: there are a lot of baking tools you simply don’t need when you’re just starting out and are getting to know the basics. Plus, money is always a factor and baking equipment, especially if it’s good quality, comes at a price.
But no matter how stripped down you want your baking setup to be—there are a few essentials you just can’t do without. So I thought I’d help you narrow things down to the 10 most essential baking tools to start out with. These are the tools I use the most in baking and that can’t be replaced with a different tool or clever hack. Plus, they’re the ones that won’t cost you a fortune, nor needlessly take up lots of storage space in your kitchen.
A little note before we get into it: I’m not going to suggest any specific brands of baking equipment here because I don’t want to turn this into an ad for certain companies, plus certain brands might not be available where you are. However, if you do have questions concerning specific products, feel free to send me a message, I’m happy to help where I can.
With that out of the way, here we go:
10 Basic Baking Tools for Beginner Bakers
1. Digital Kitchen Scale
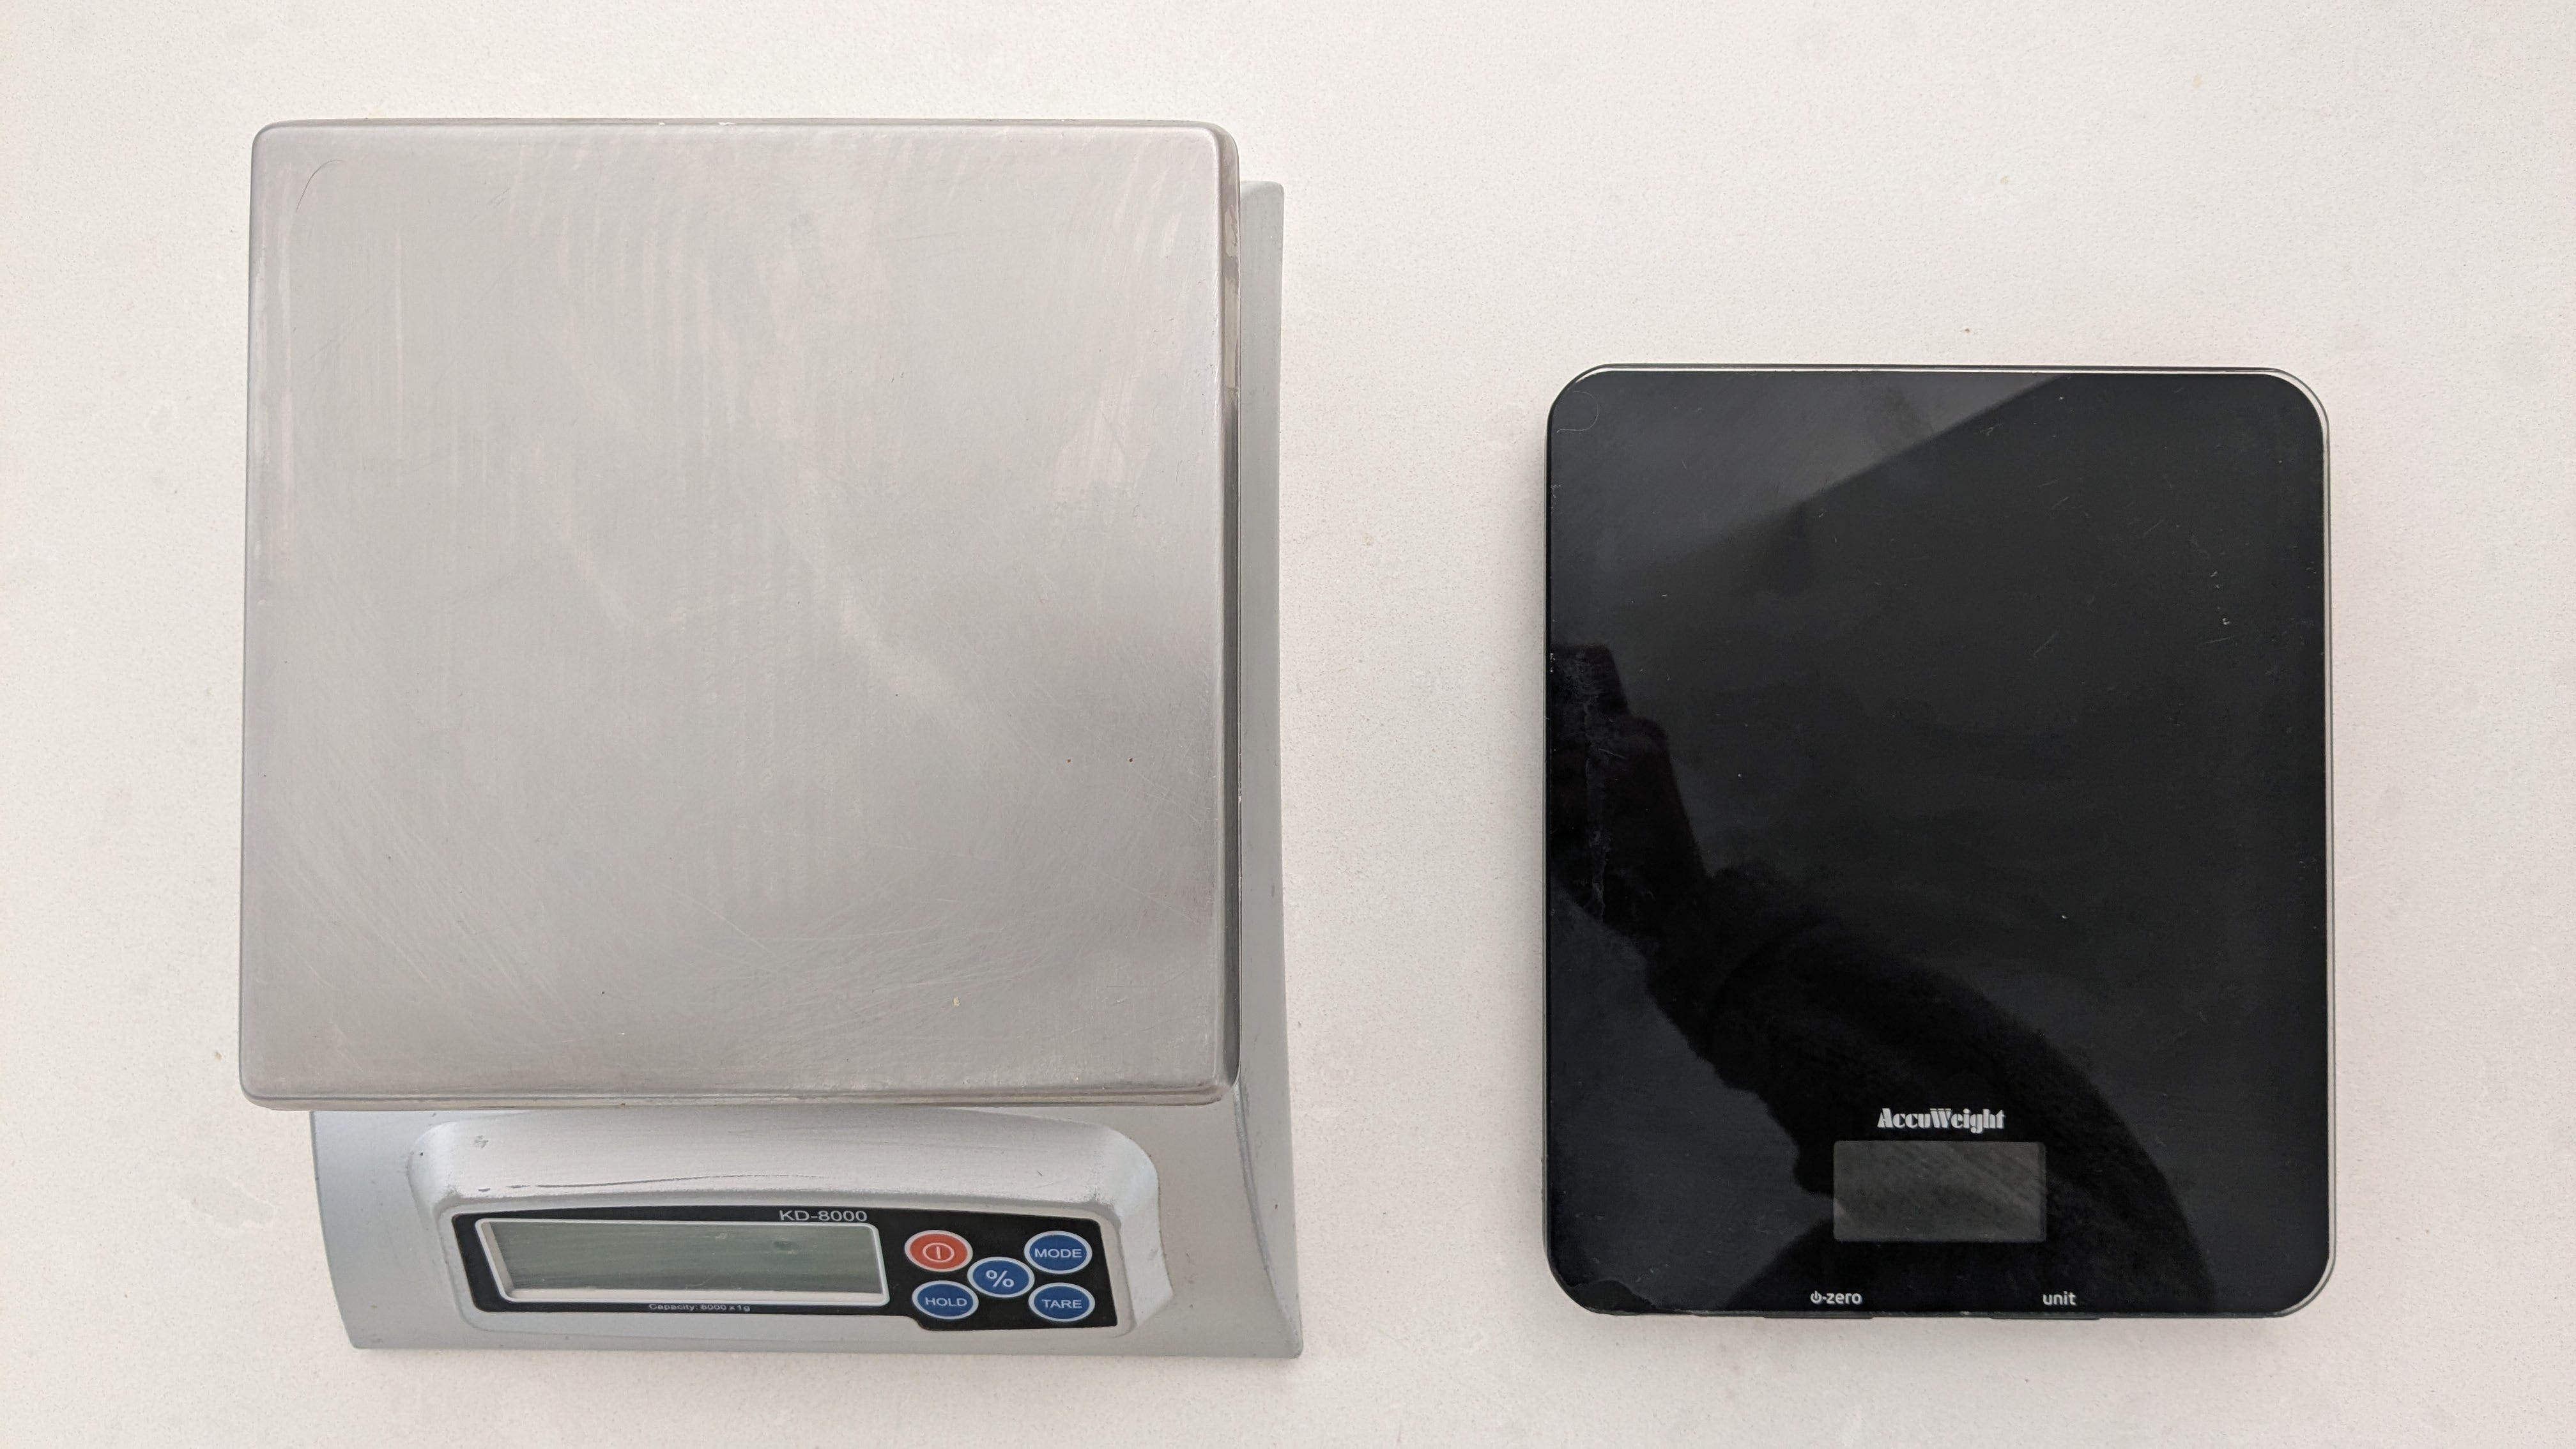
I’ve said it in the first recipe I posted and I’ll say it again: if you want to start baking, I strongly suggest investing in a digital kitchen scale. Baking is all about precision, and measuring ingredients by volume will never be as precise as weighing them. The added benefit of using a kitchen scale is that you don’t need to use (and clean!) a bunch of different measuring cups. There are good affordable options out there, and you definitely don’t have to buy the most expensive one. I suggest paying attention to the maximum weight you need the scale to go to and the format you’d prefer: something small and flat to stow away more easily? Or something a bit bigger with a removable platform? It’s always good to compare a few options and go with a model with good reviews that’s been around for a while.
2. Baking Pan(s)
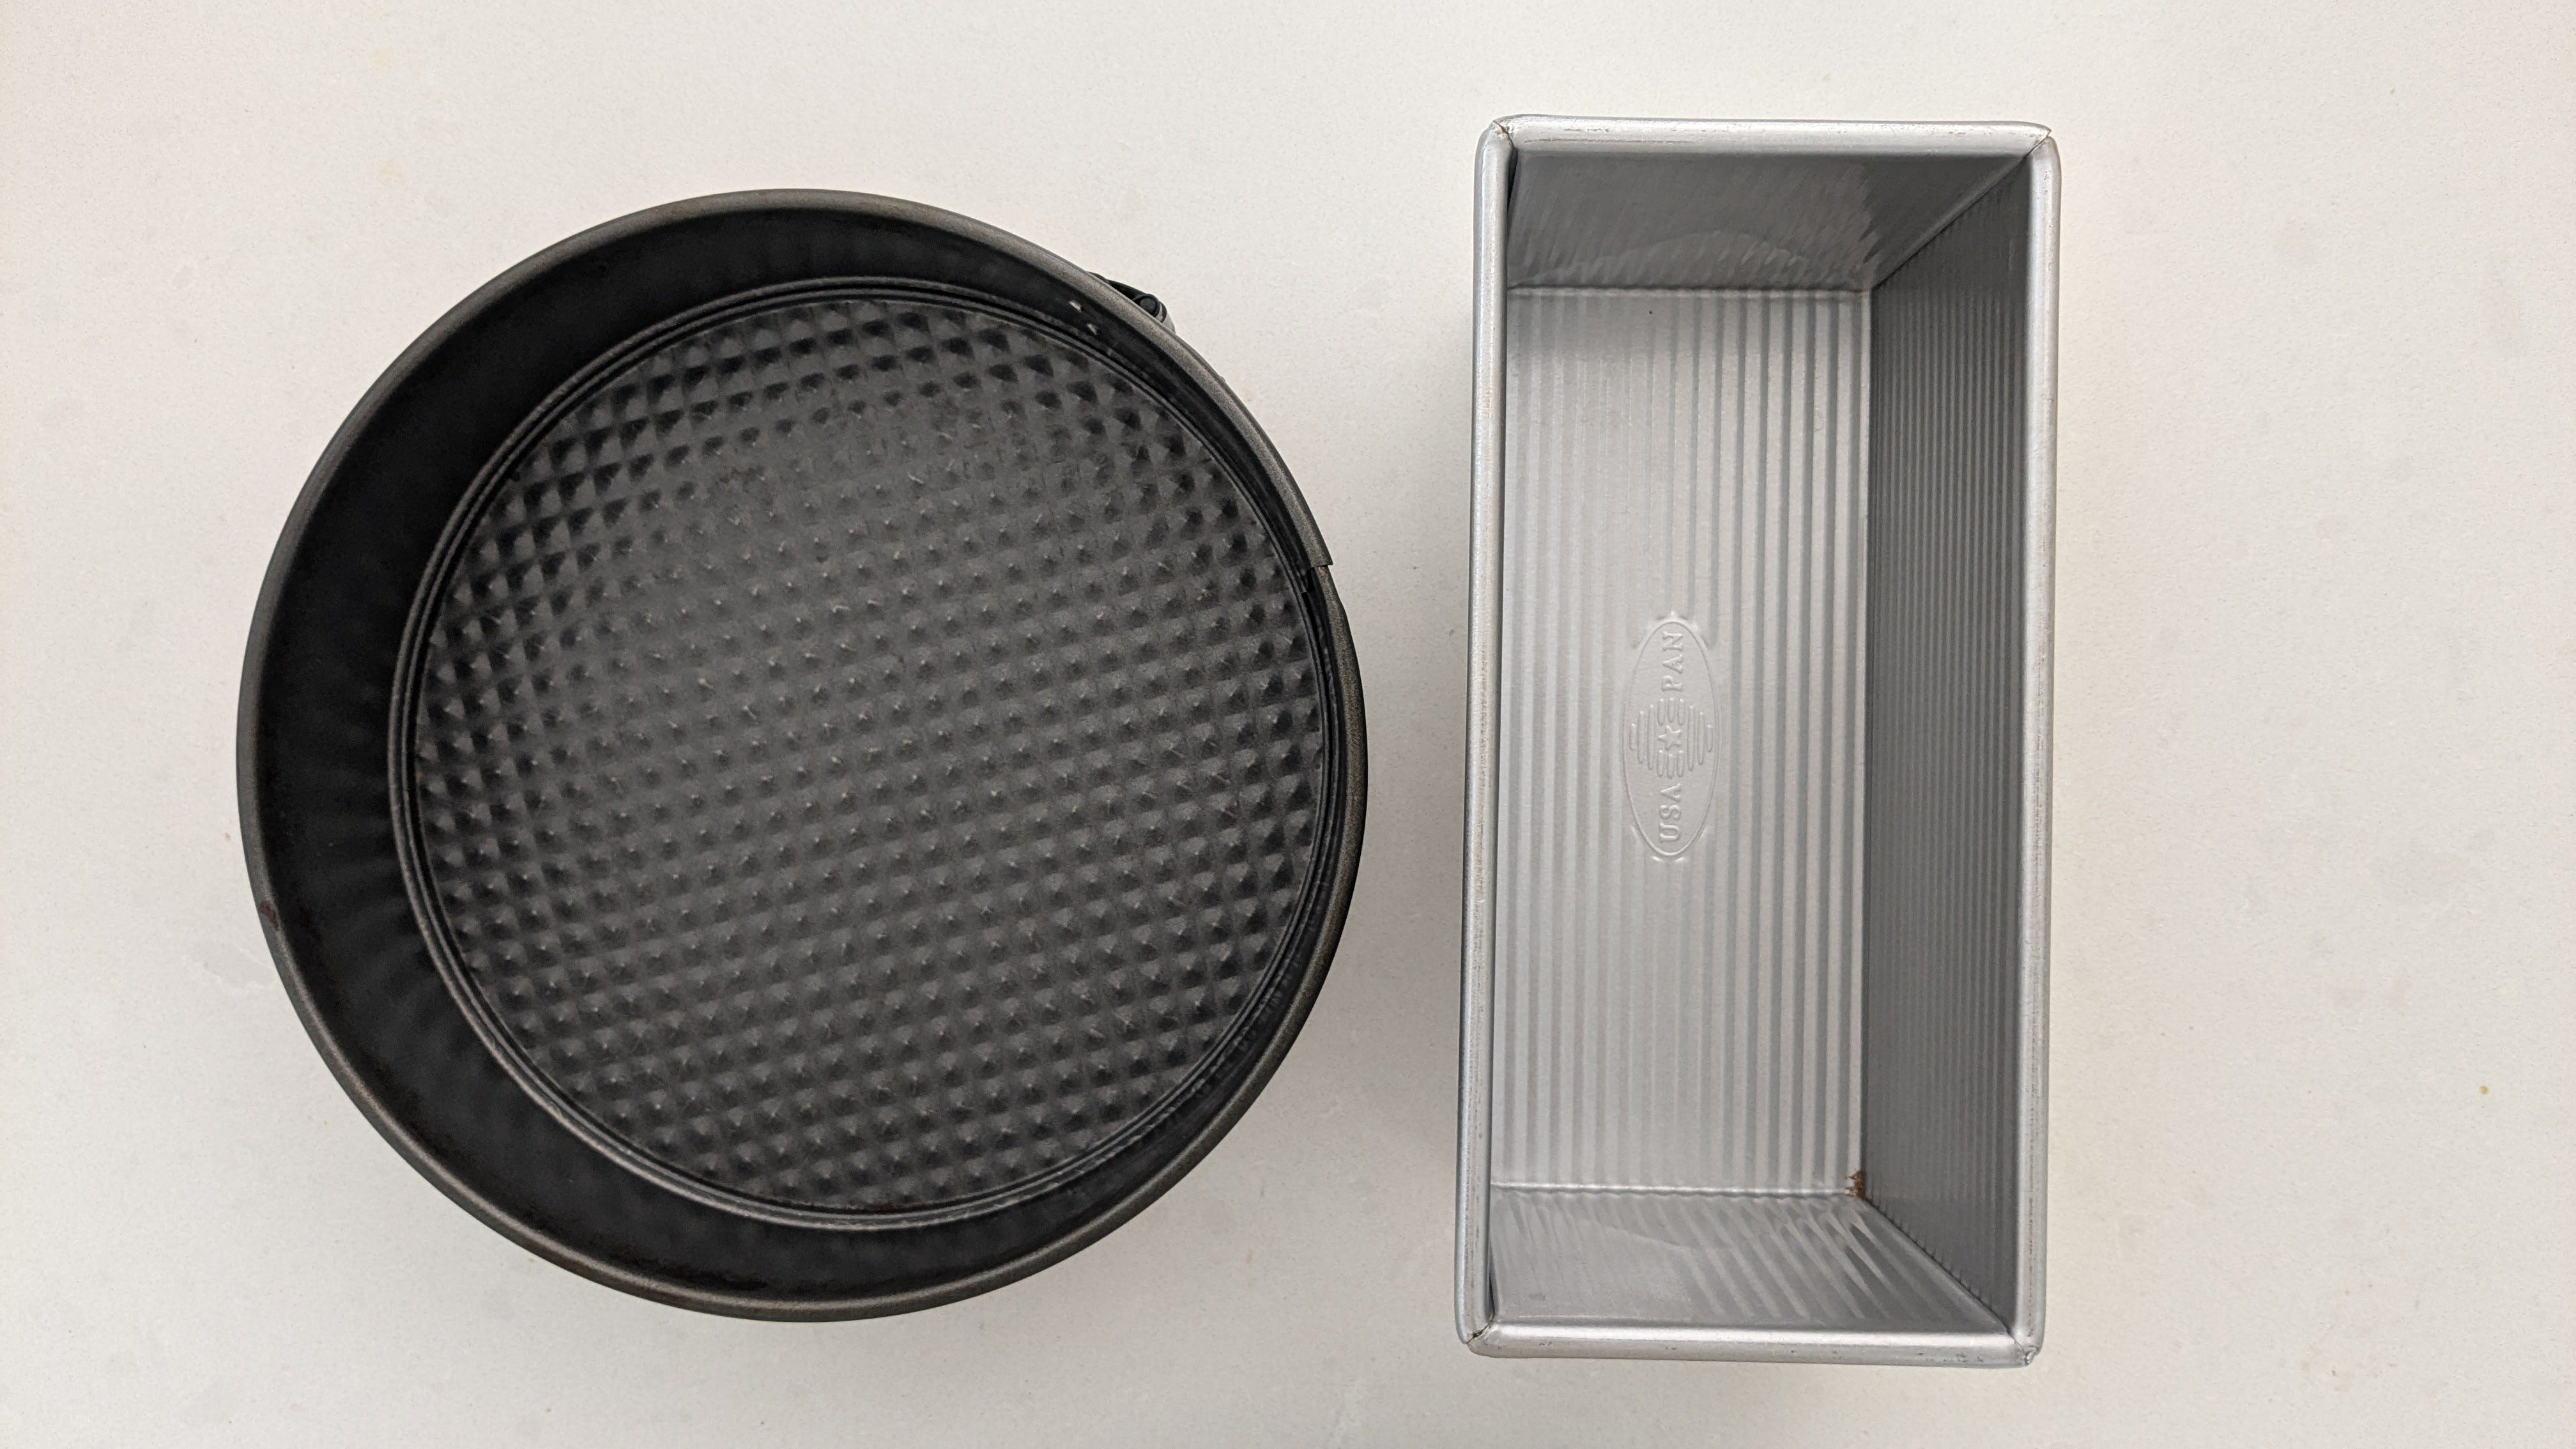
When it comes to baking pans, there are a lot of options out there: springforms, loaf pans, tart tins, pie tins, muffin tins, square pans, rectangular pans, silicone molds, and the list goes on. But if I had to suggest just two to start with, I’d go with a 9’’ round springform and a loaf pan that holds at least 1kg of dough/batter. These two will cover a lot of ground for beginners, from all kinds of cakes, to quick breads and loaves of brioche or babka. One thing I find especially important when it comes to pans: go with metal. Silicone molds or Pyrex dishes don’t conduct heat as well or evenly as metal and just don’t deliver the same browning, crispness or flakiness as metal pans.
I’d suggest investing in higher quality pans. They usually conduct heat more evenly and, in the case of springforms, are less likely to leak.
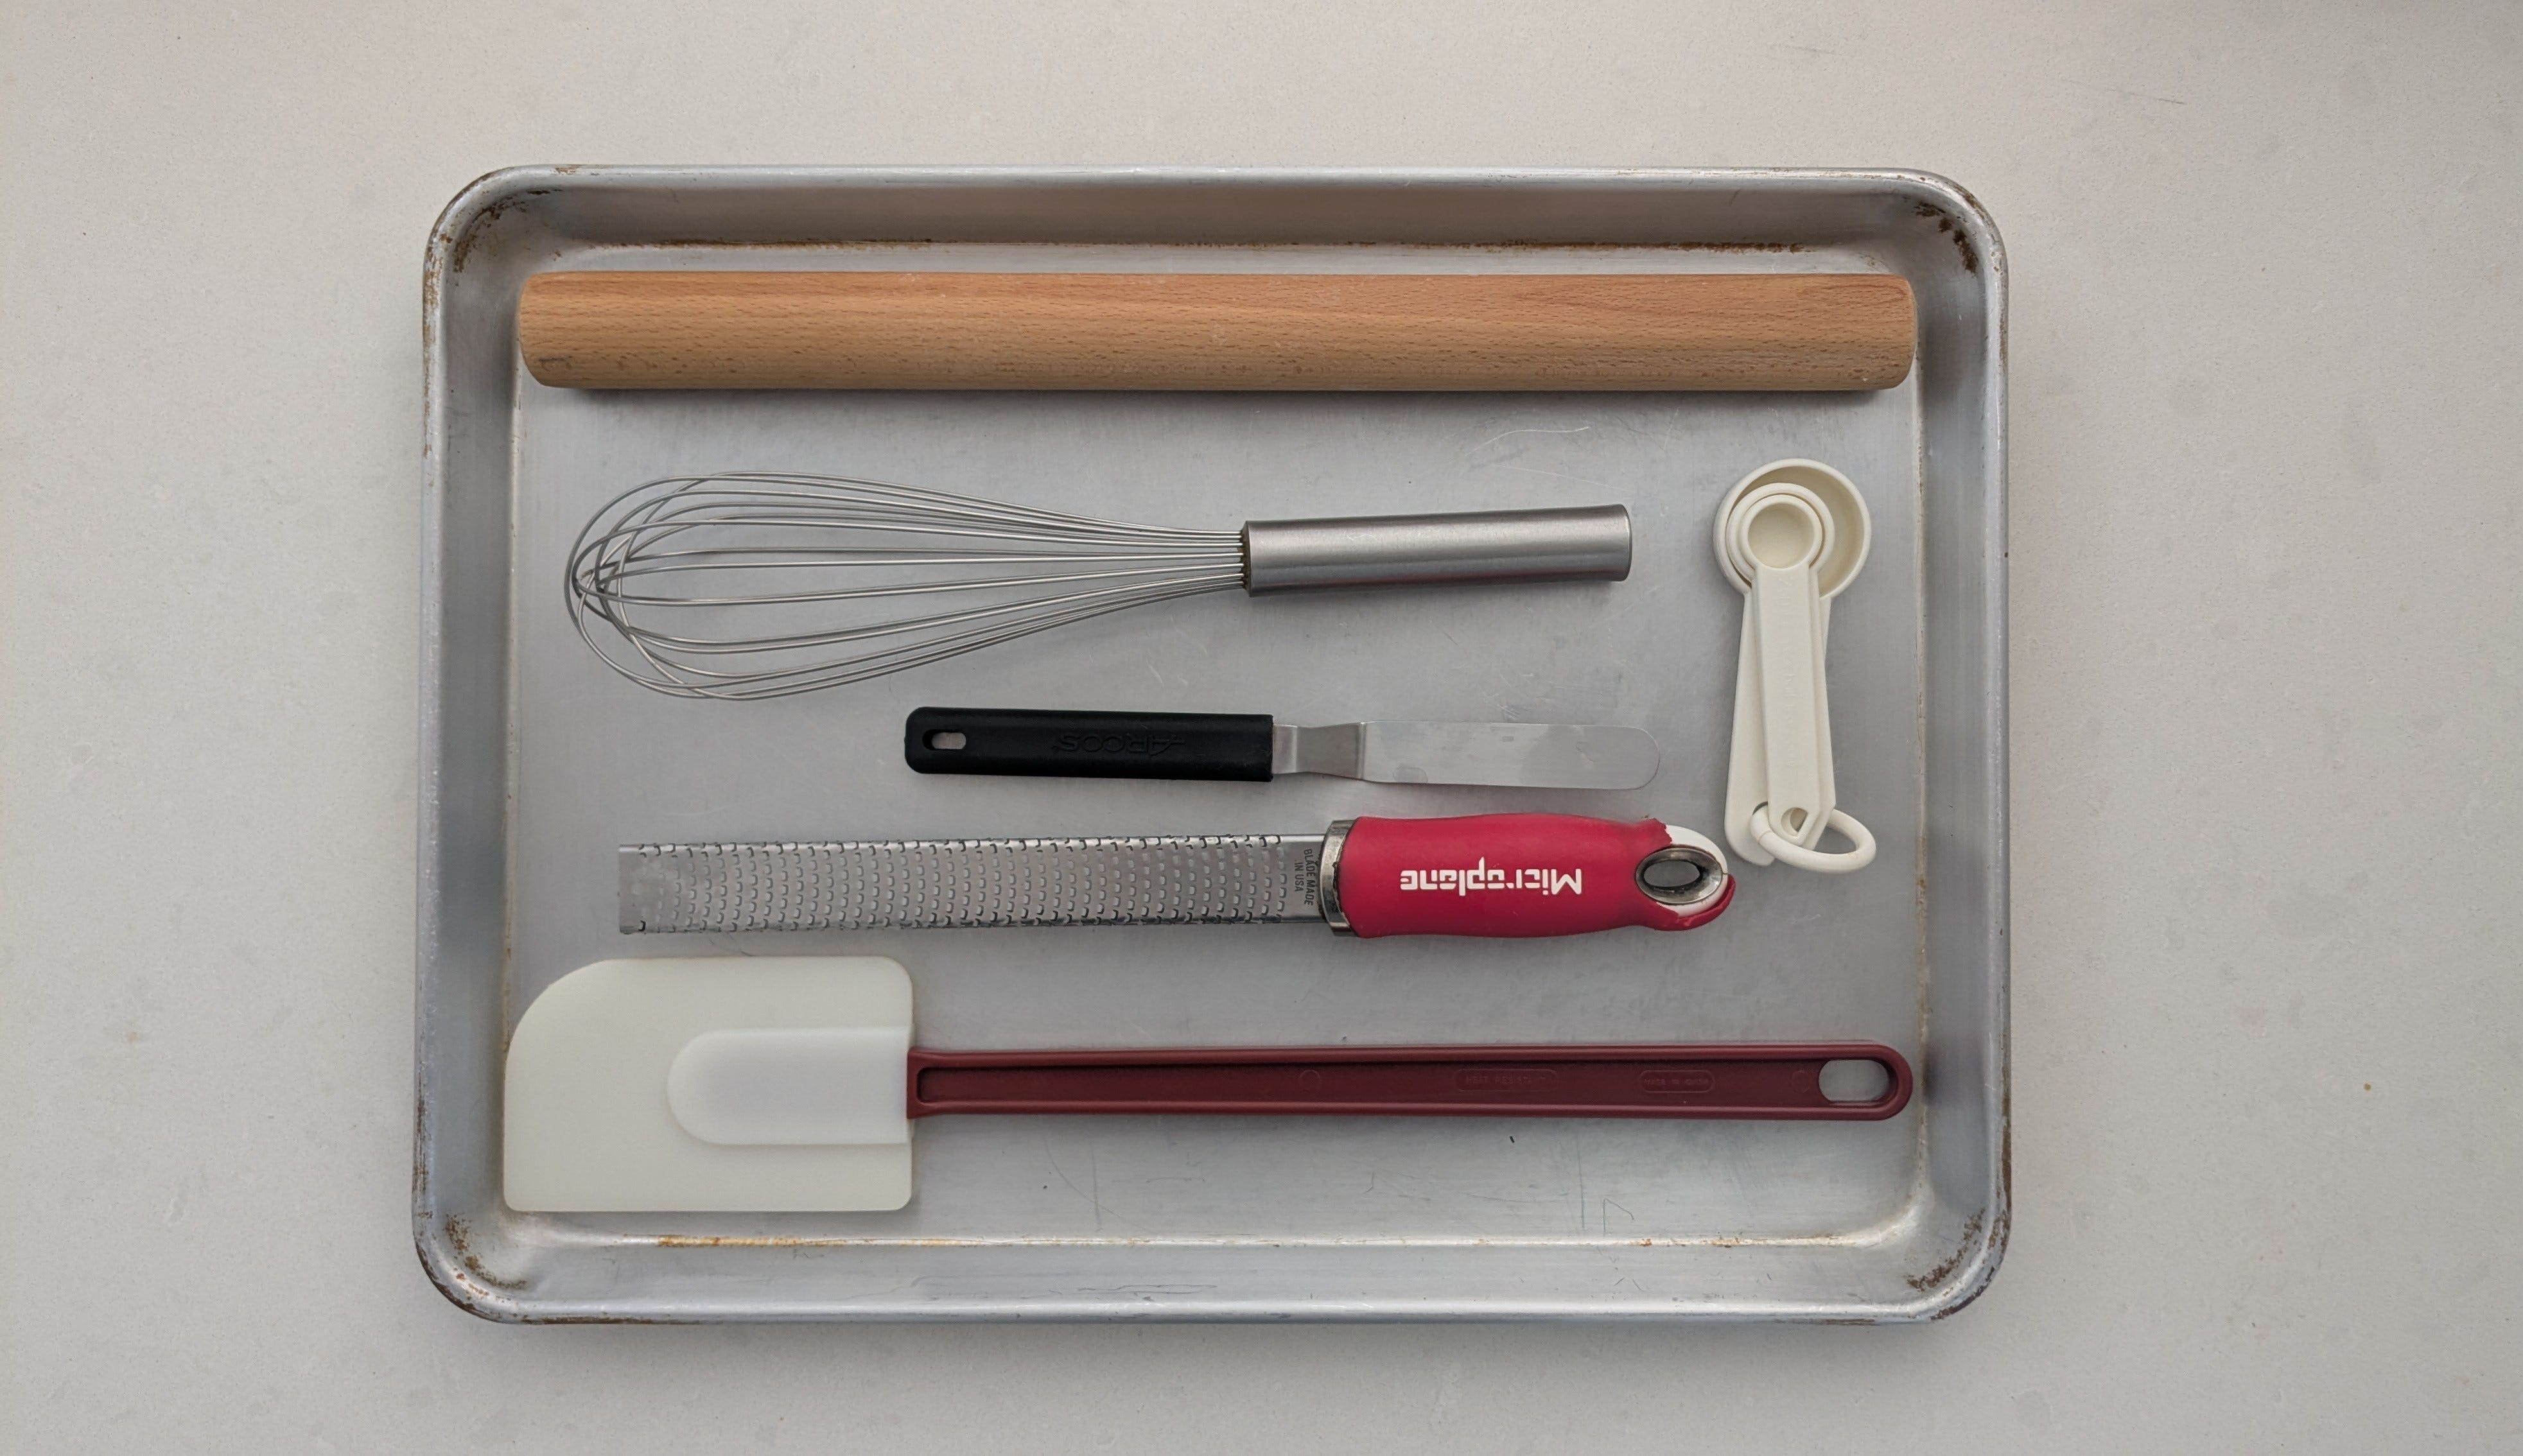
3. Basic Hand Tools
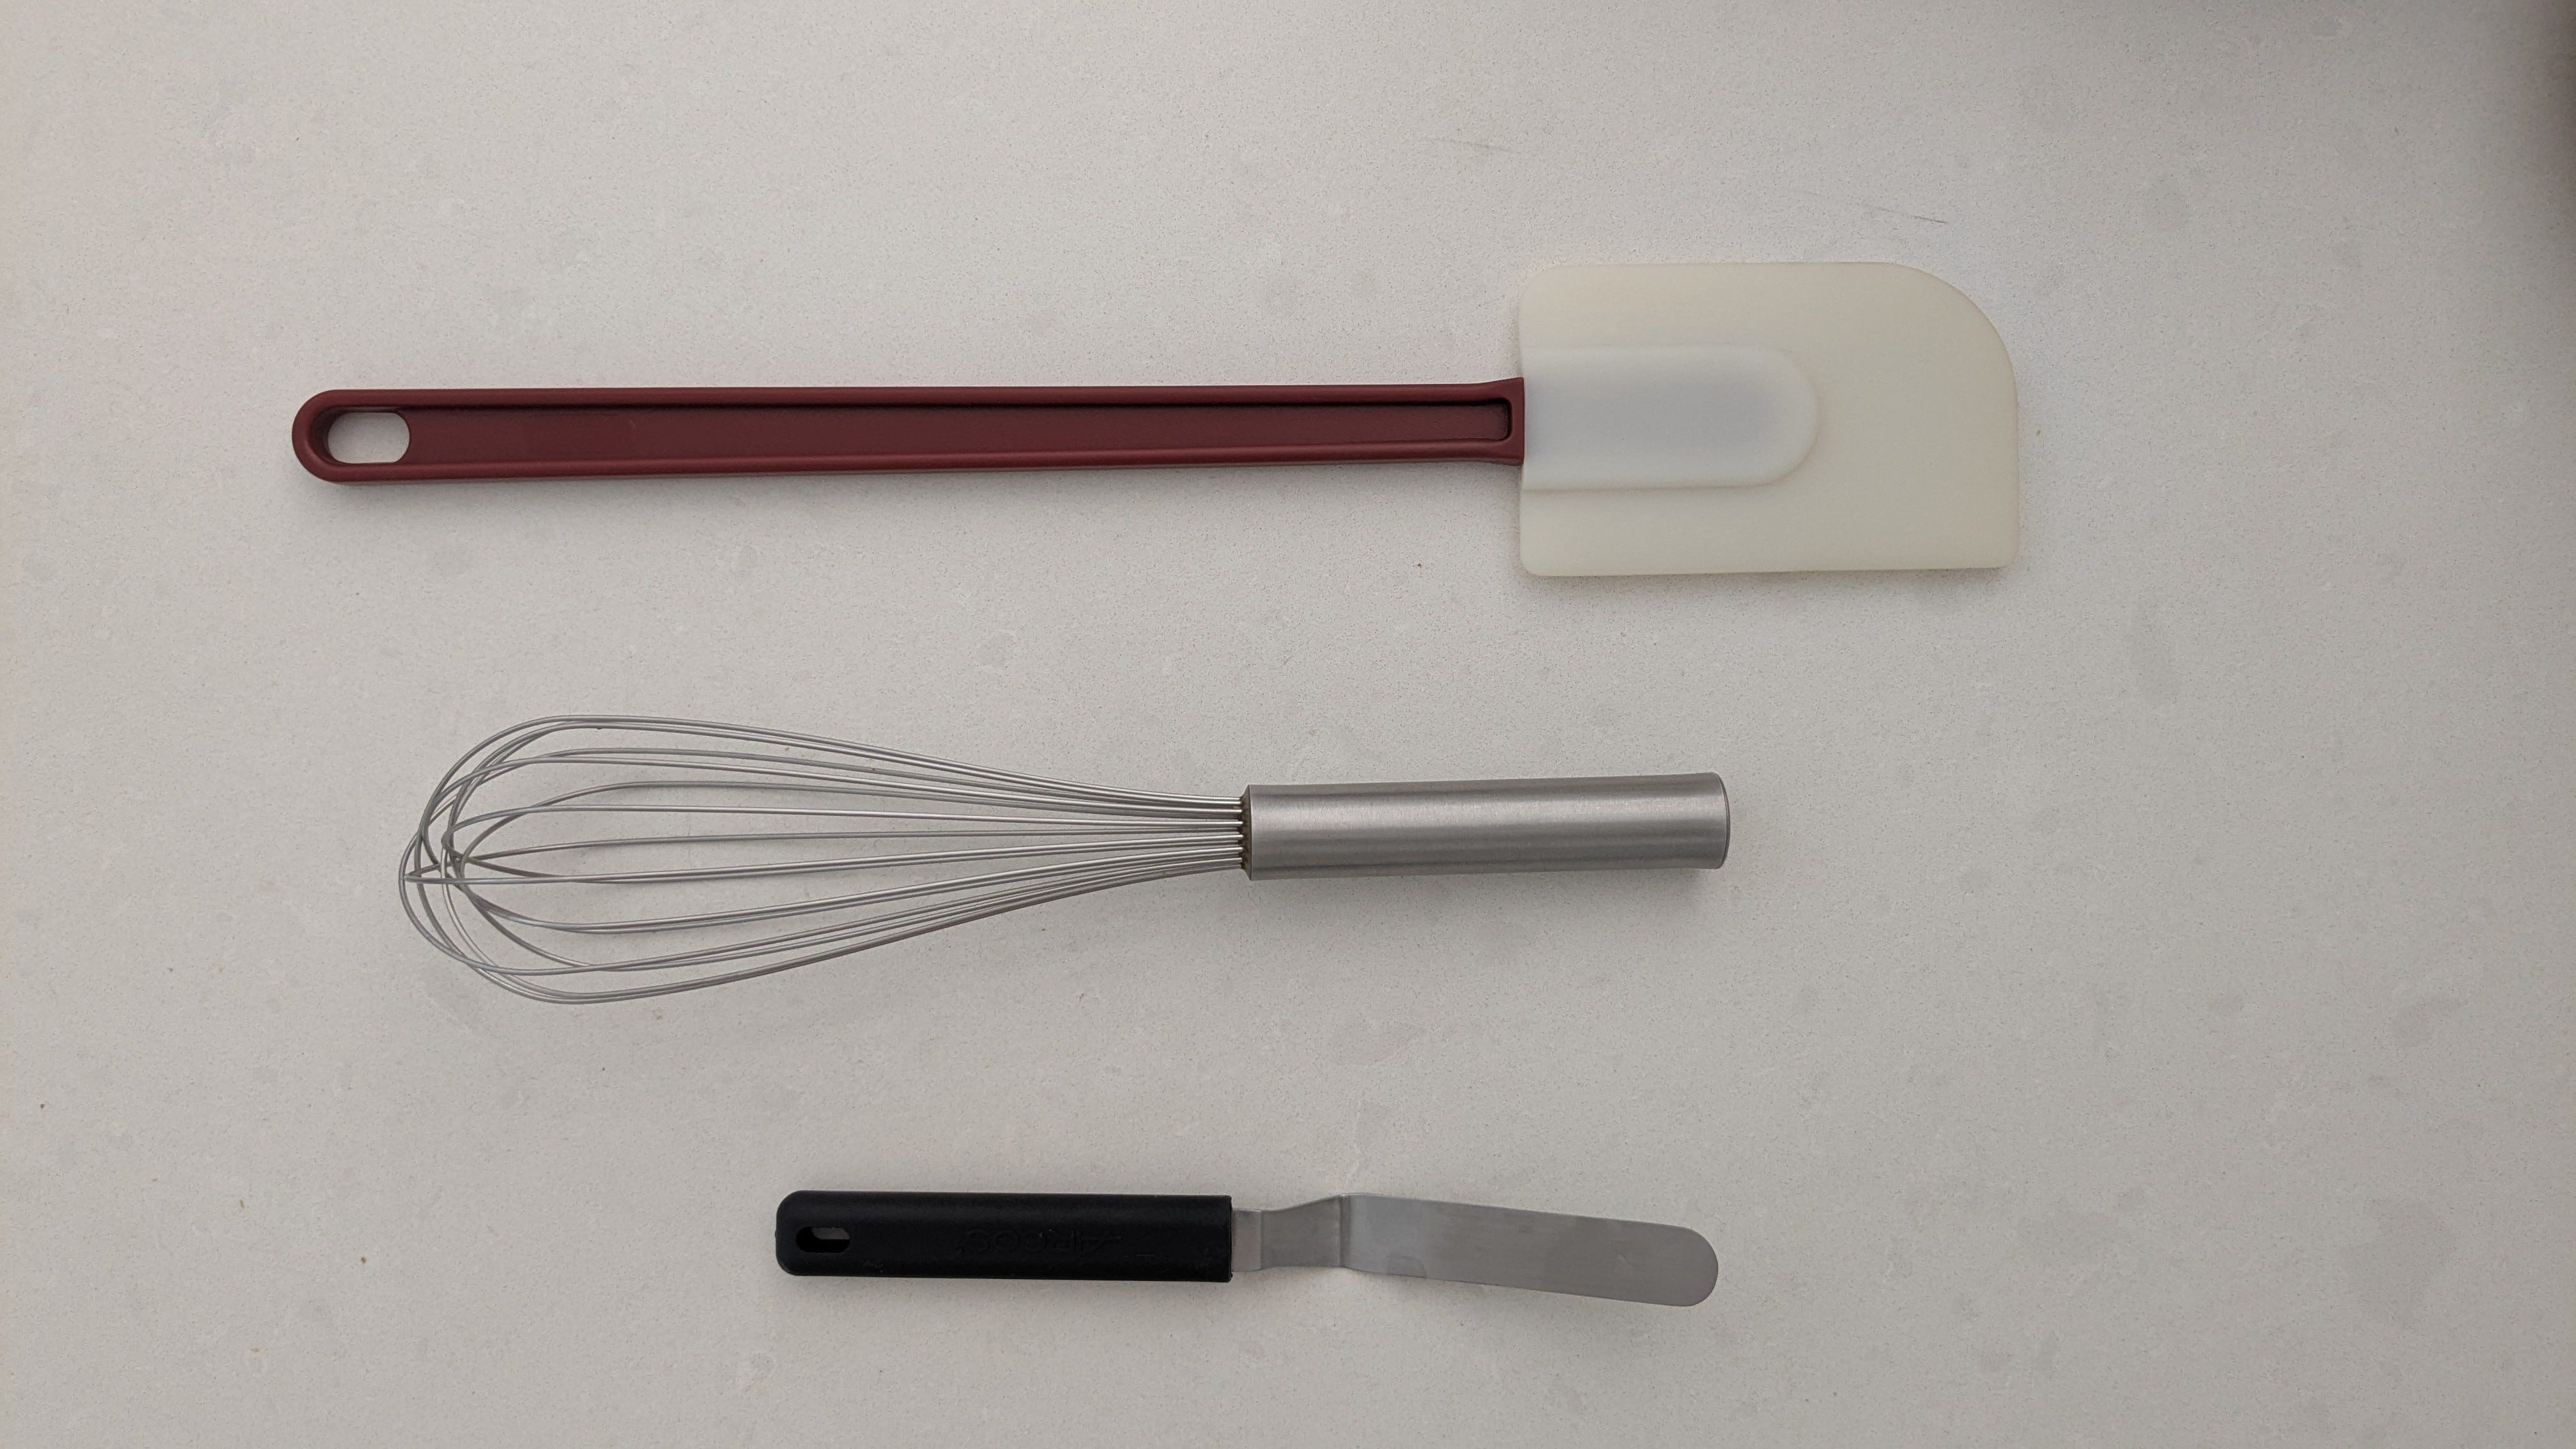
I’m admittedly cheating a bit with this one, because it’s actually three in one, but these hand tools basically go together: a whisk; a silicone spatula; and a little off-set spatula.
The good old whisk is just an absolute staple: it lets you whisk together your dry ingredients, mix basic cake batters, and you can even—with a bit of elbow grease—whip up cream or egg whites by hand. I suggest getting a high-quality metal whisk that’s at least medium size, so you can mix bigger quantities as well.
When it comes to silicone spatulas I suggest getting the bigger size (don’t get a mini one because it’s just not as useful) and a heat-proof model—this way you can use it for browning butter or recipes that need constant stirring (such as custard).
Off-set spatulas are super versatile and your most basic decorating tool. You can use them to level cake batter after you pour it into the pan as well as to spread icing or frosting on a cake, making the finish look clean and sharp.
4. Measuring Spoons

I know, I just insisted on using a kitchen scale, and I still do. But I highly suggest complementing your scale with a complete set of measuring spoons (at least 1/4 teaspoon, 1/2 teaspoon, 1 teaspoon, 1 tablespoon). Some quantities are simply too small to be weighed out with a normal kitchen scale, plus using measuring spoons can help you avoid dirtying another bowl. In my recipes I like to indicate smaller quantities in tablespoons or teaspoons as well as grams to make things easier.
5. Hand Mixer
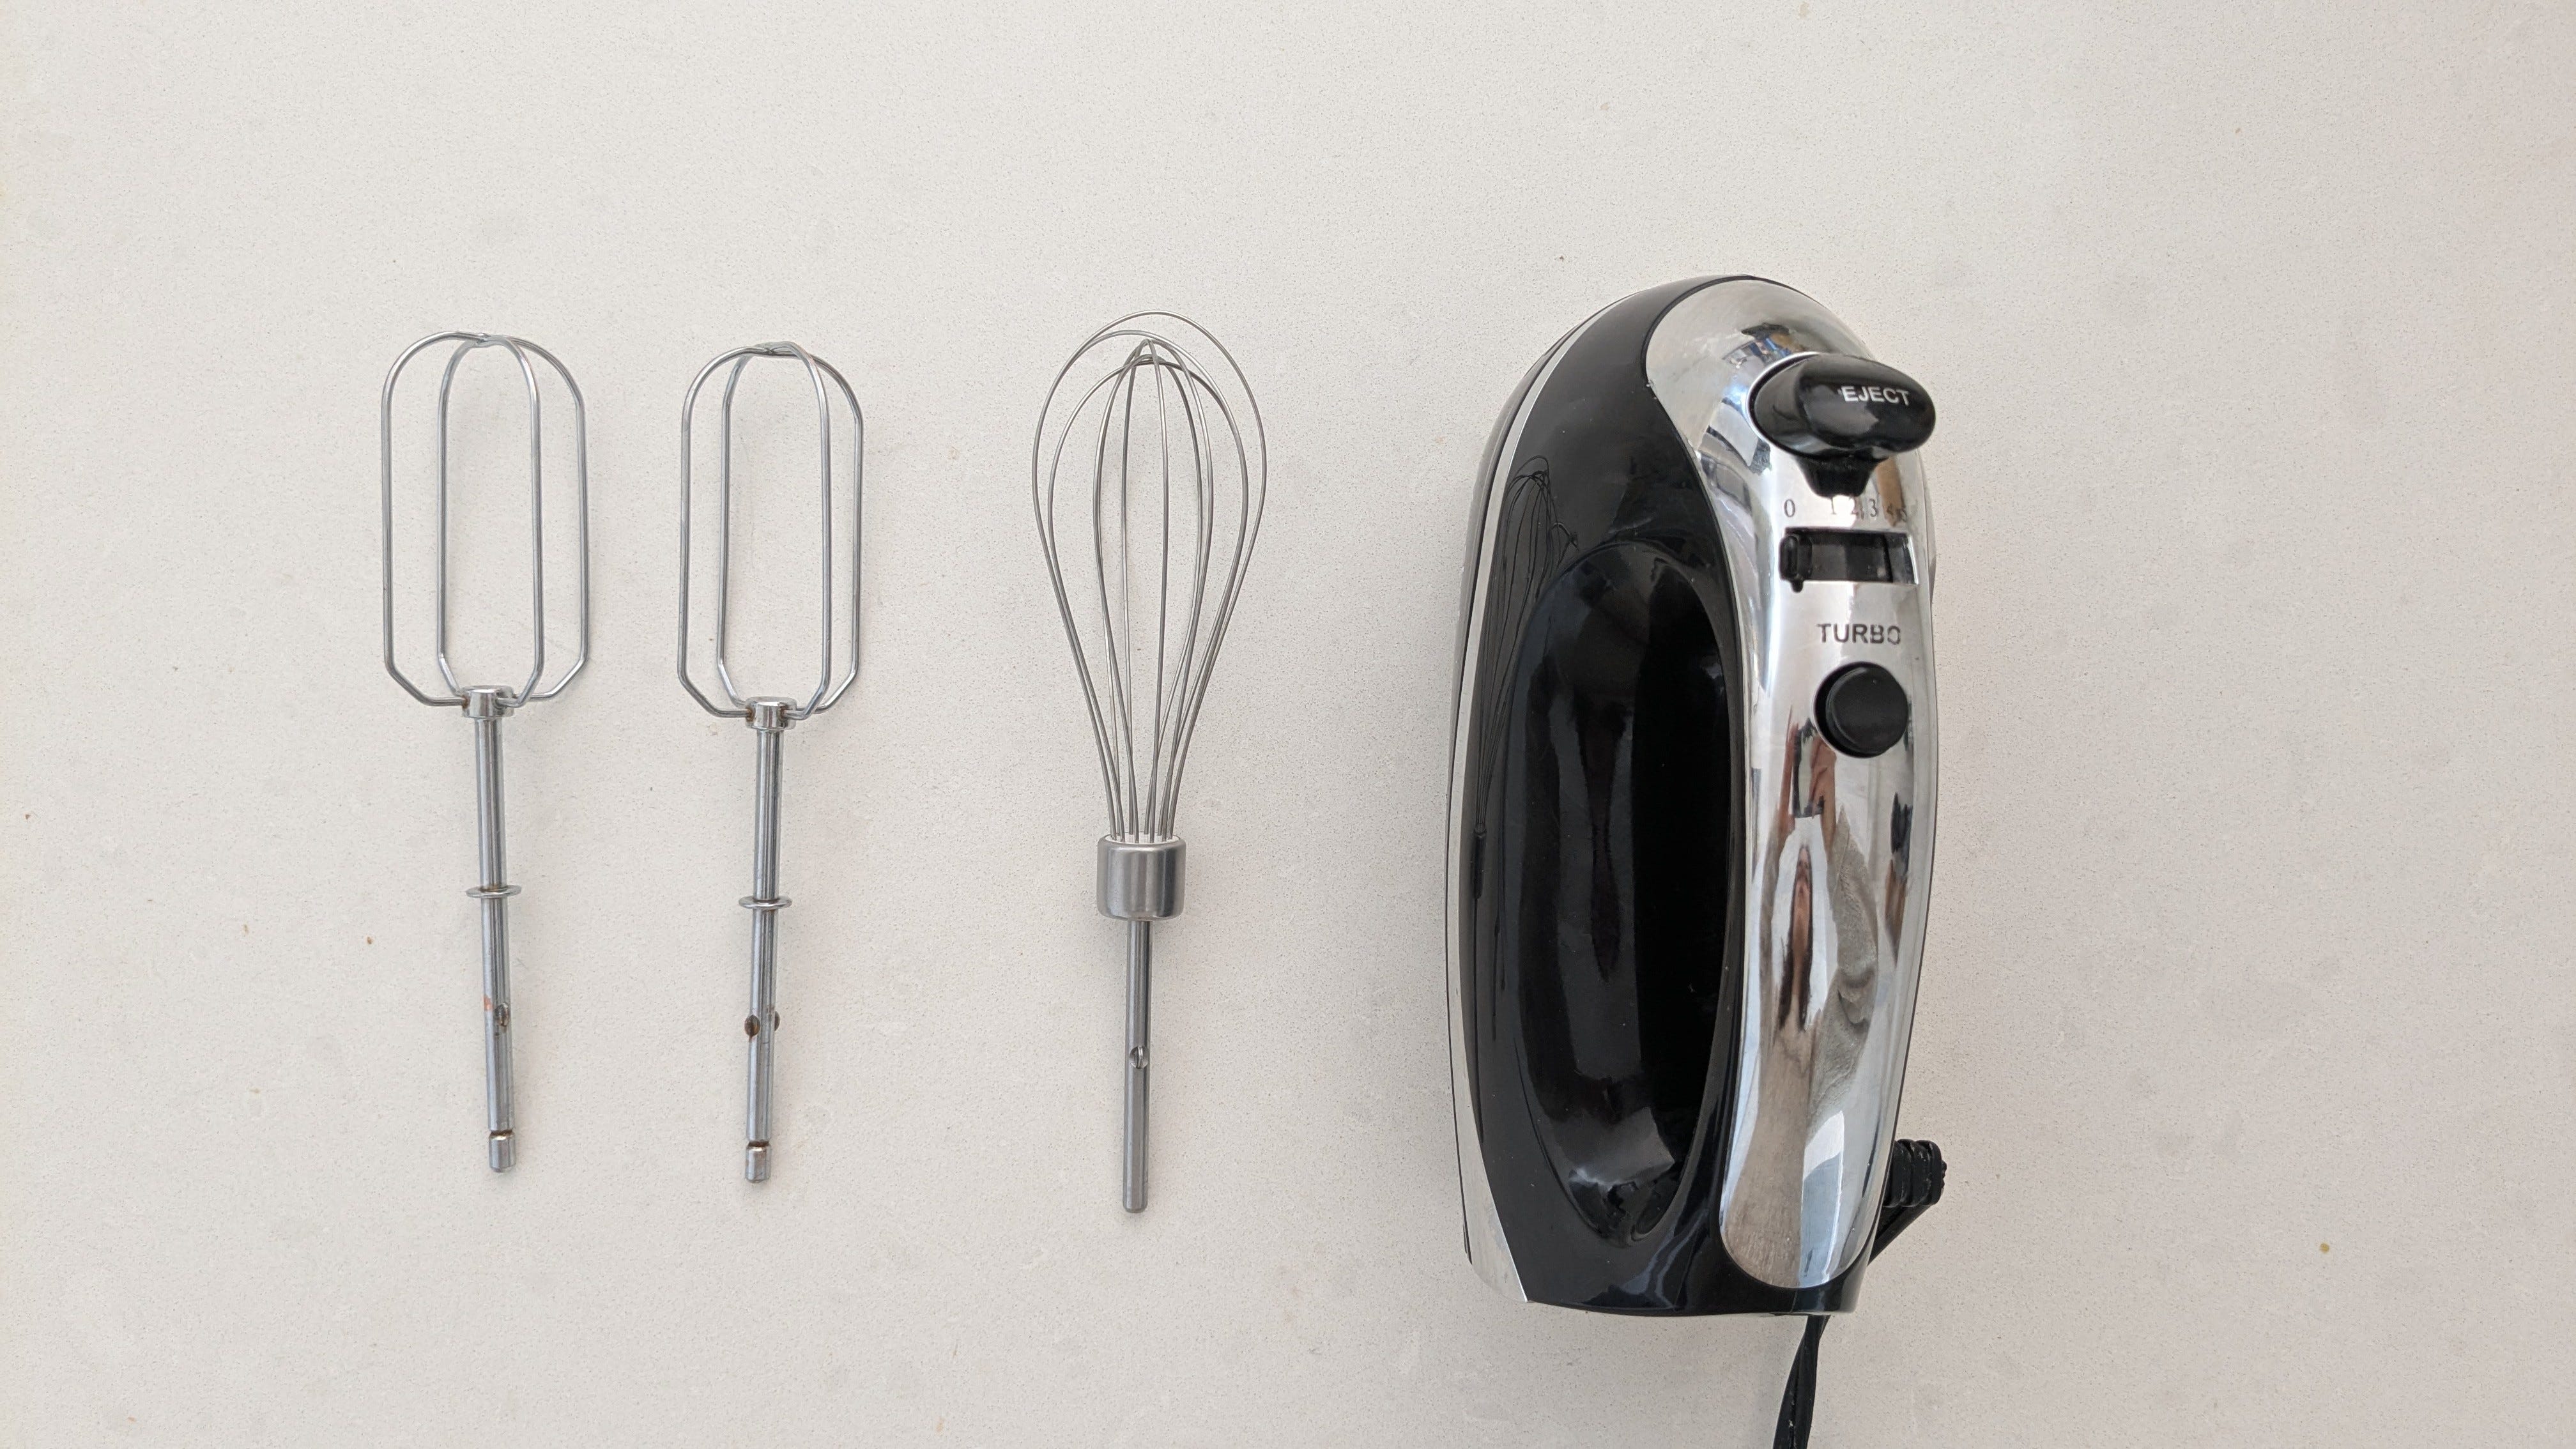
This is probably the most costly item on the list, but also the one that will make your baking life much easier. Hand mixers are great tools that open up a lot of basic techniques and recipes: creaming butter or eggs with sugar, making whipped cream, whisking egg whites, mixing batters, even kneading some doughs. They come at a much lower price point than stand mixers and don’t eat up a lot of storage space in your kitchen. Make sure to get one that comes at least with whisk and paddle attachments, ideally even with dough hooks. You don’t have to buy the most expensive model, but I wouldn’t go with the cheapest one either—the motors in very cheap kitchen equipment tend to overheat quickly and the metal used for the attachments might not be dishwasher safe (I’ve had some rust on me before). I’d get a model with lots of good reviews that’s already been on the market for a while.
Note: If you already know you’ll be making a lot of baked goods that require intensive and long kneading (such as bread, brioche, milk bread etc.), you might want to look into a stand mixer instead. Stand mixers are much better for kneading, plus they allow you to have your hands free. However, it’s definitely a bigger investment.
6. Baking Sheet(s)
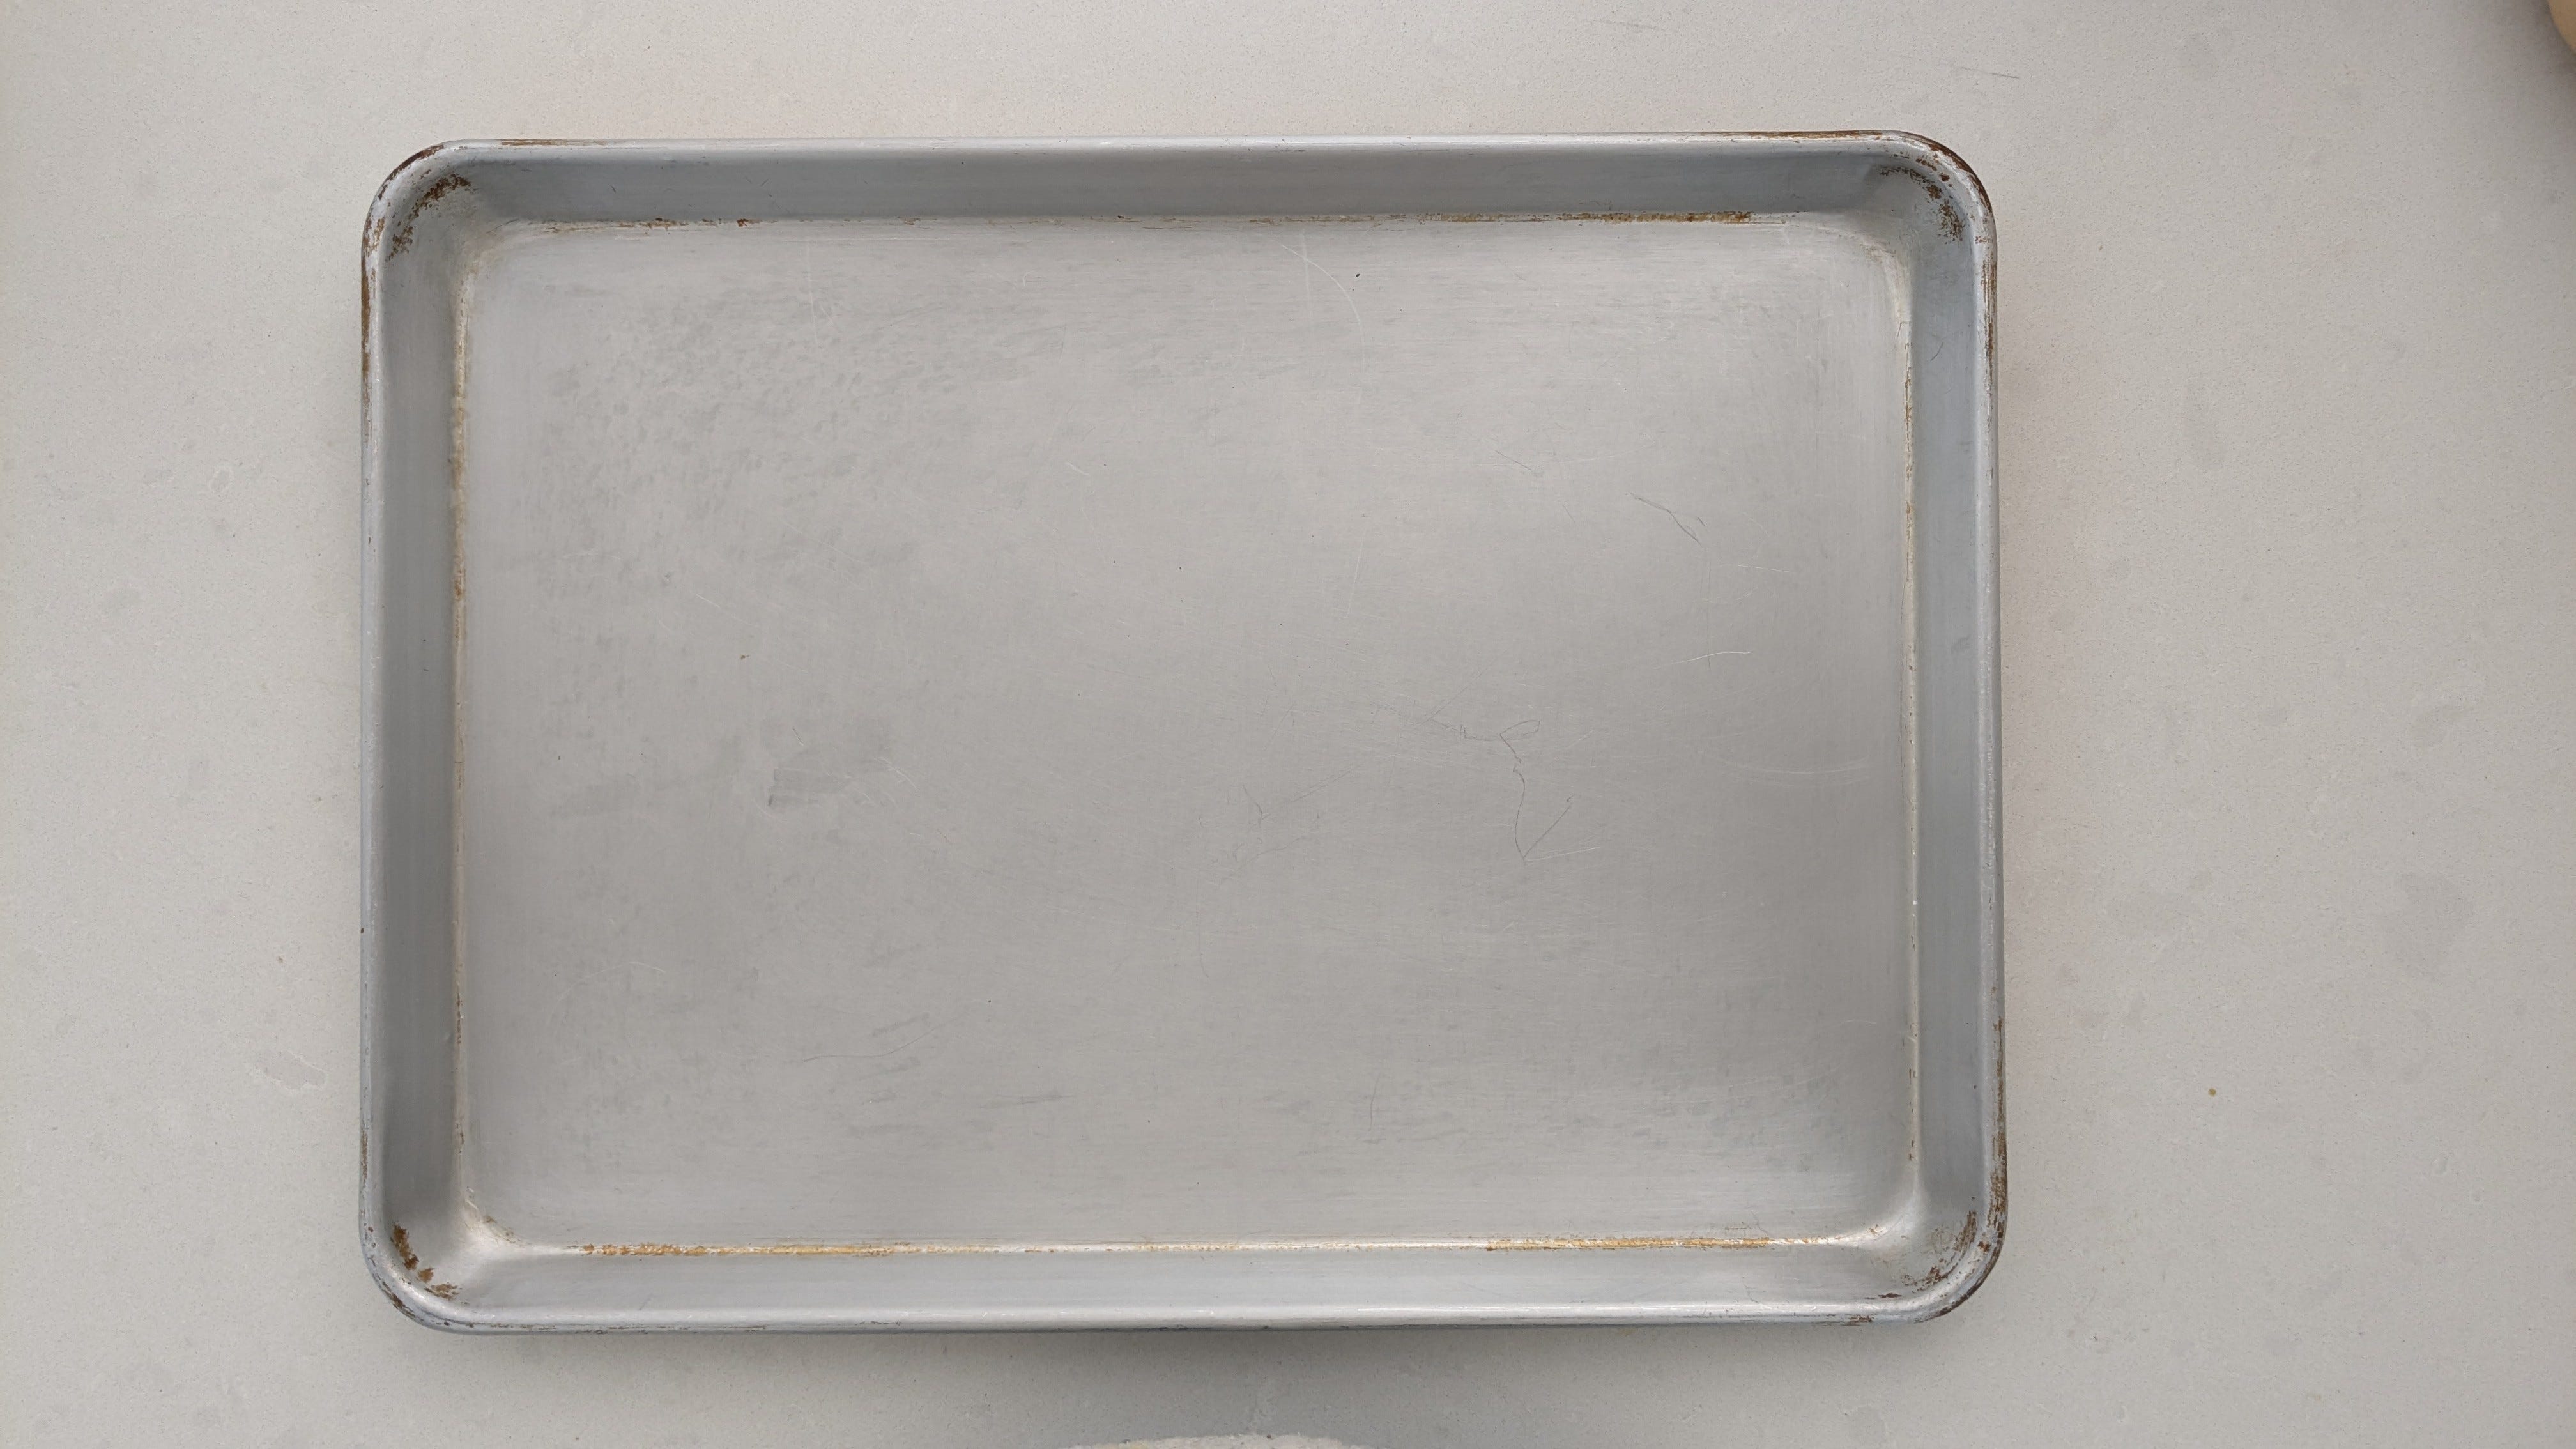
It might seem obvious, but, as I learned when I moved to North America, not every household has baking sheets (in Germany, where I’m from, they come with your oven). I suggest getting at least one half-size baking sheet (18x13 inches) for baking cookies or roasting fruit or vegetables (or even baking a sheet cake or slab pie). I suggest getting one at a medium price point—lower quality ones tend to warp over time.
7. Cooling Rack(s)
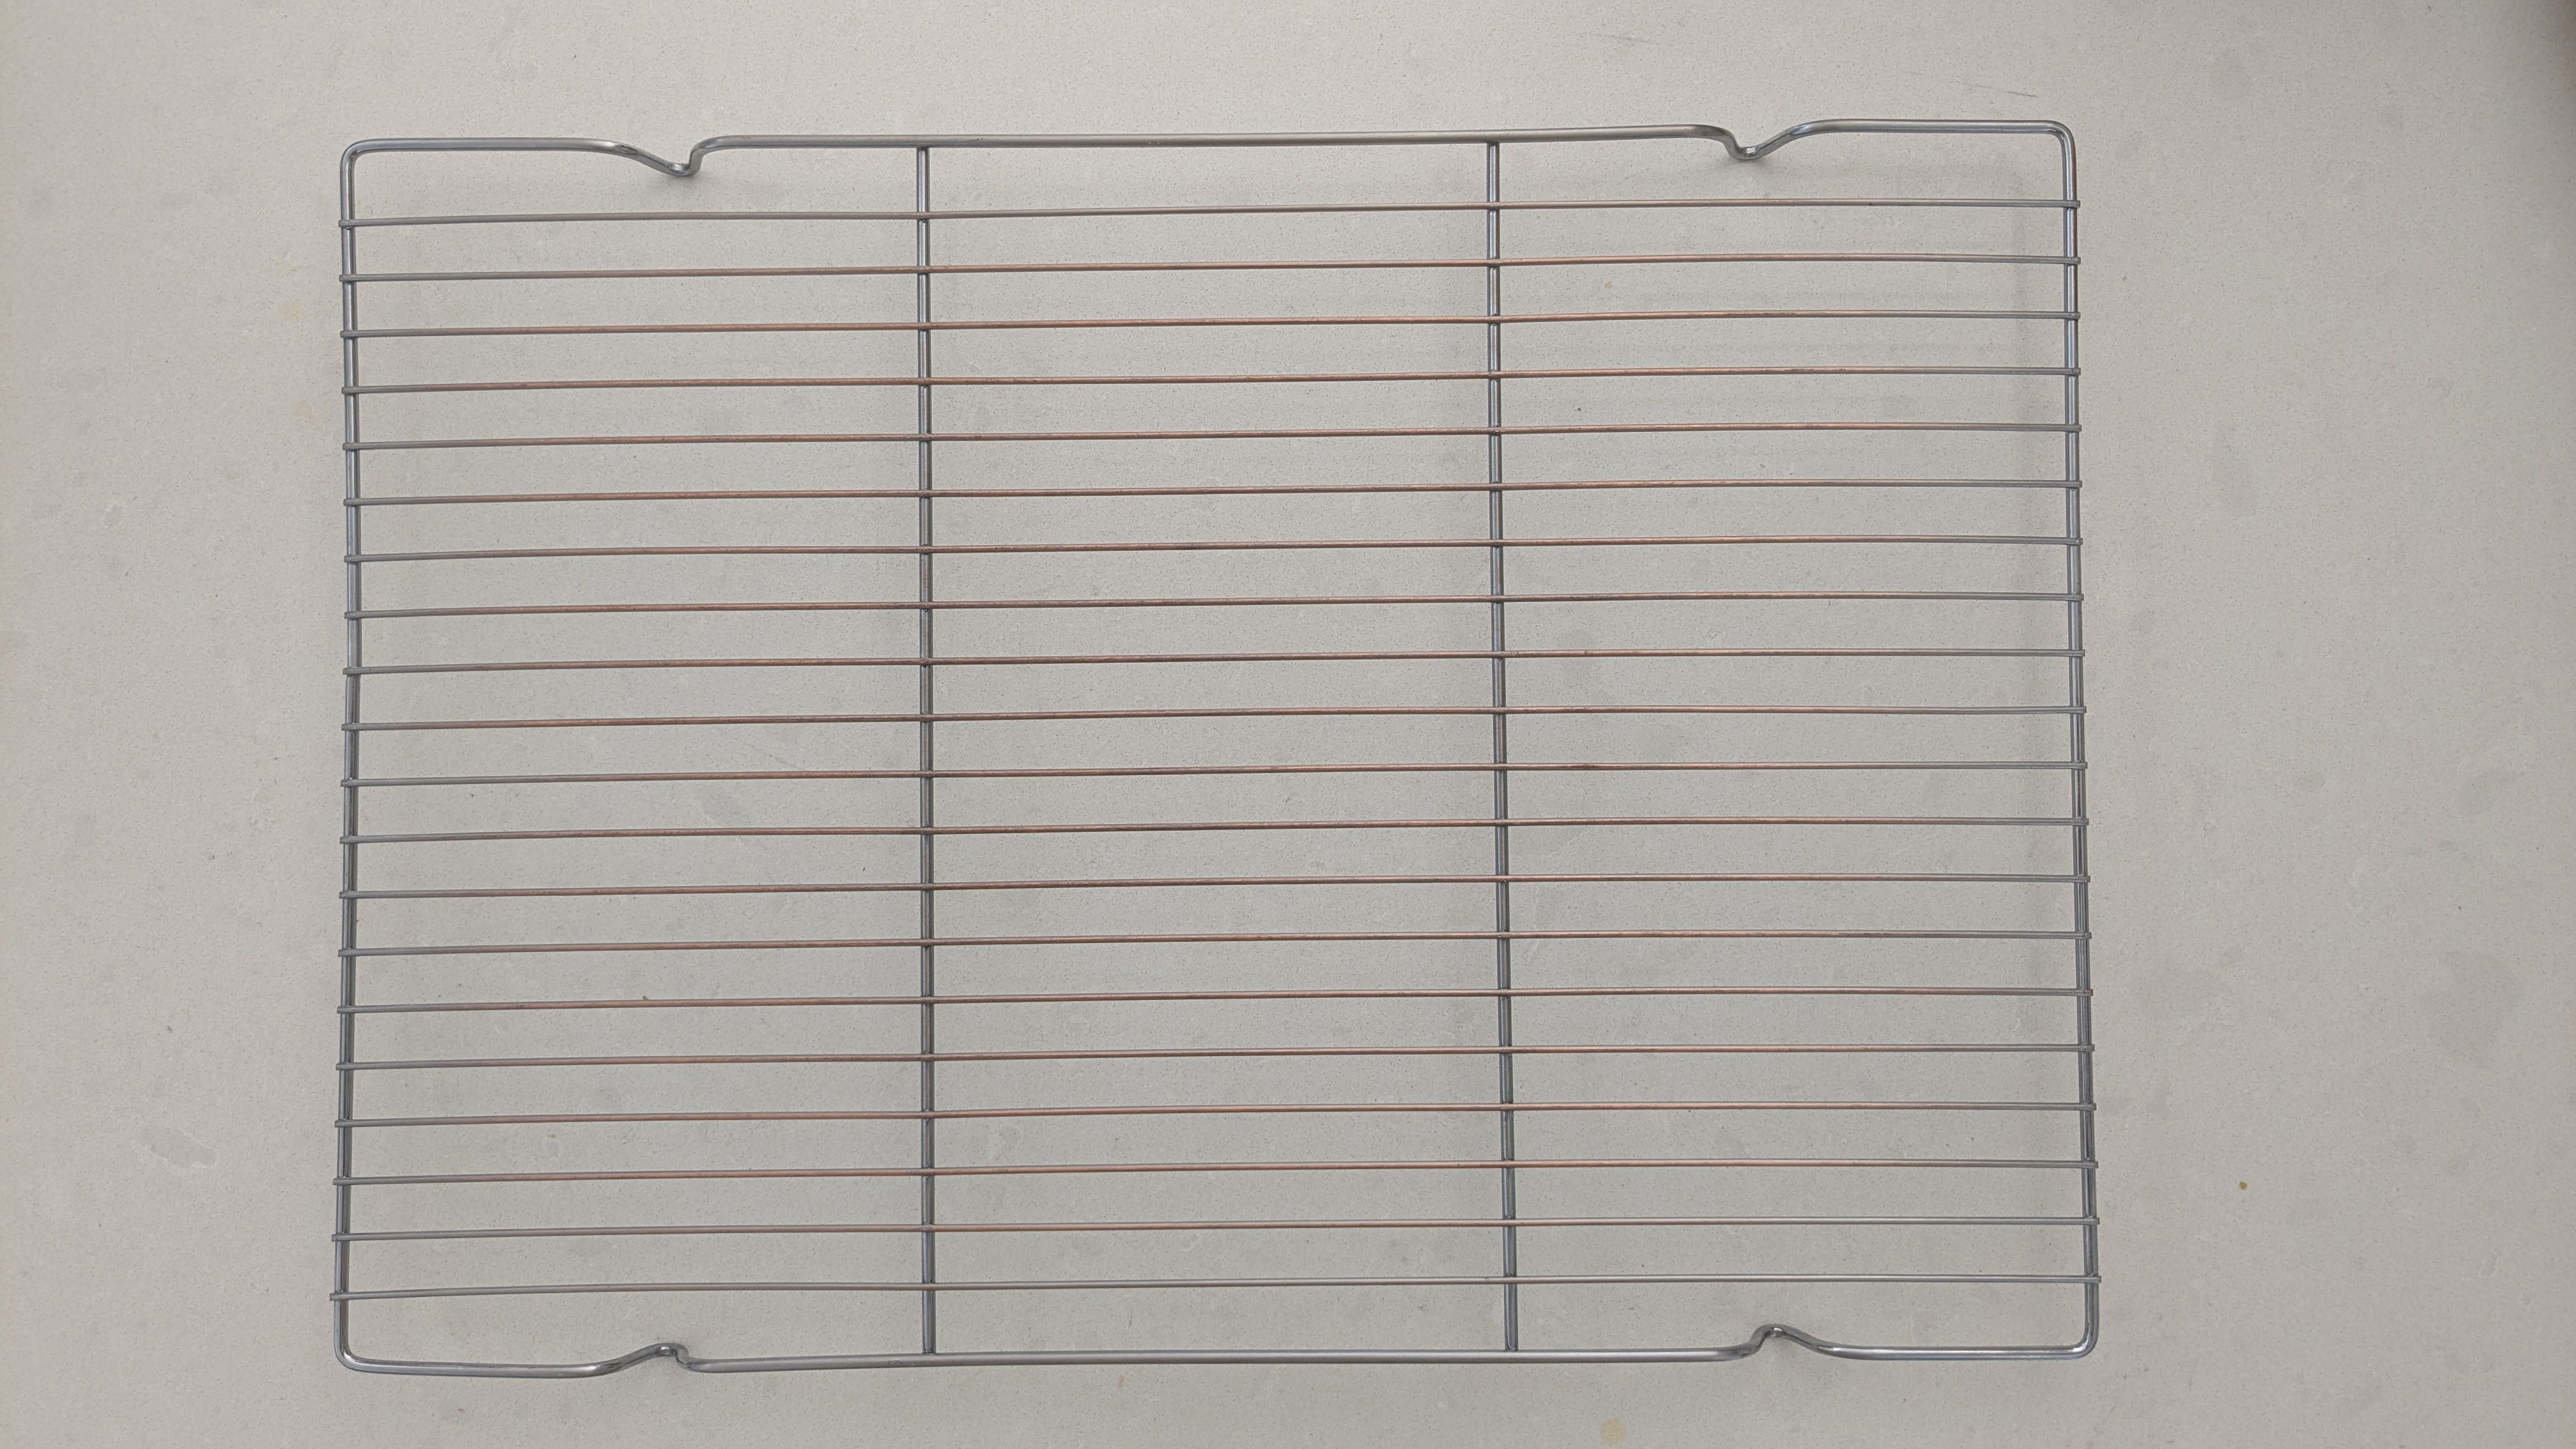
Cooling racks are, unfortunately, often overlooked. You might think you can skip this one, but I highly suggest otherwise. It’s important to always let your baked goods cool down properly, with proper air circulation. Otherwise you can lose important (and delicious) textures or, even worse, end up with a soggy bottomed cake or pastry that becomes less stable and more difficult to handle. Feel free to get a cheap one, they don’t have to be the most sturdy or withstand oven heat.
8. Fine mesh sieve
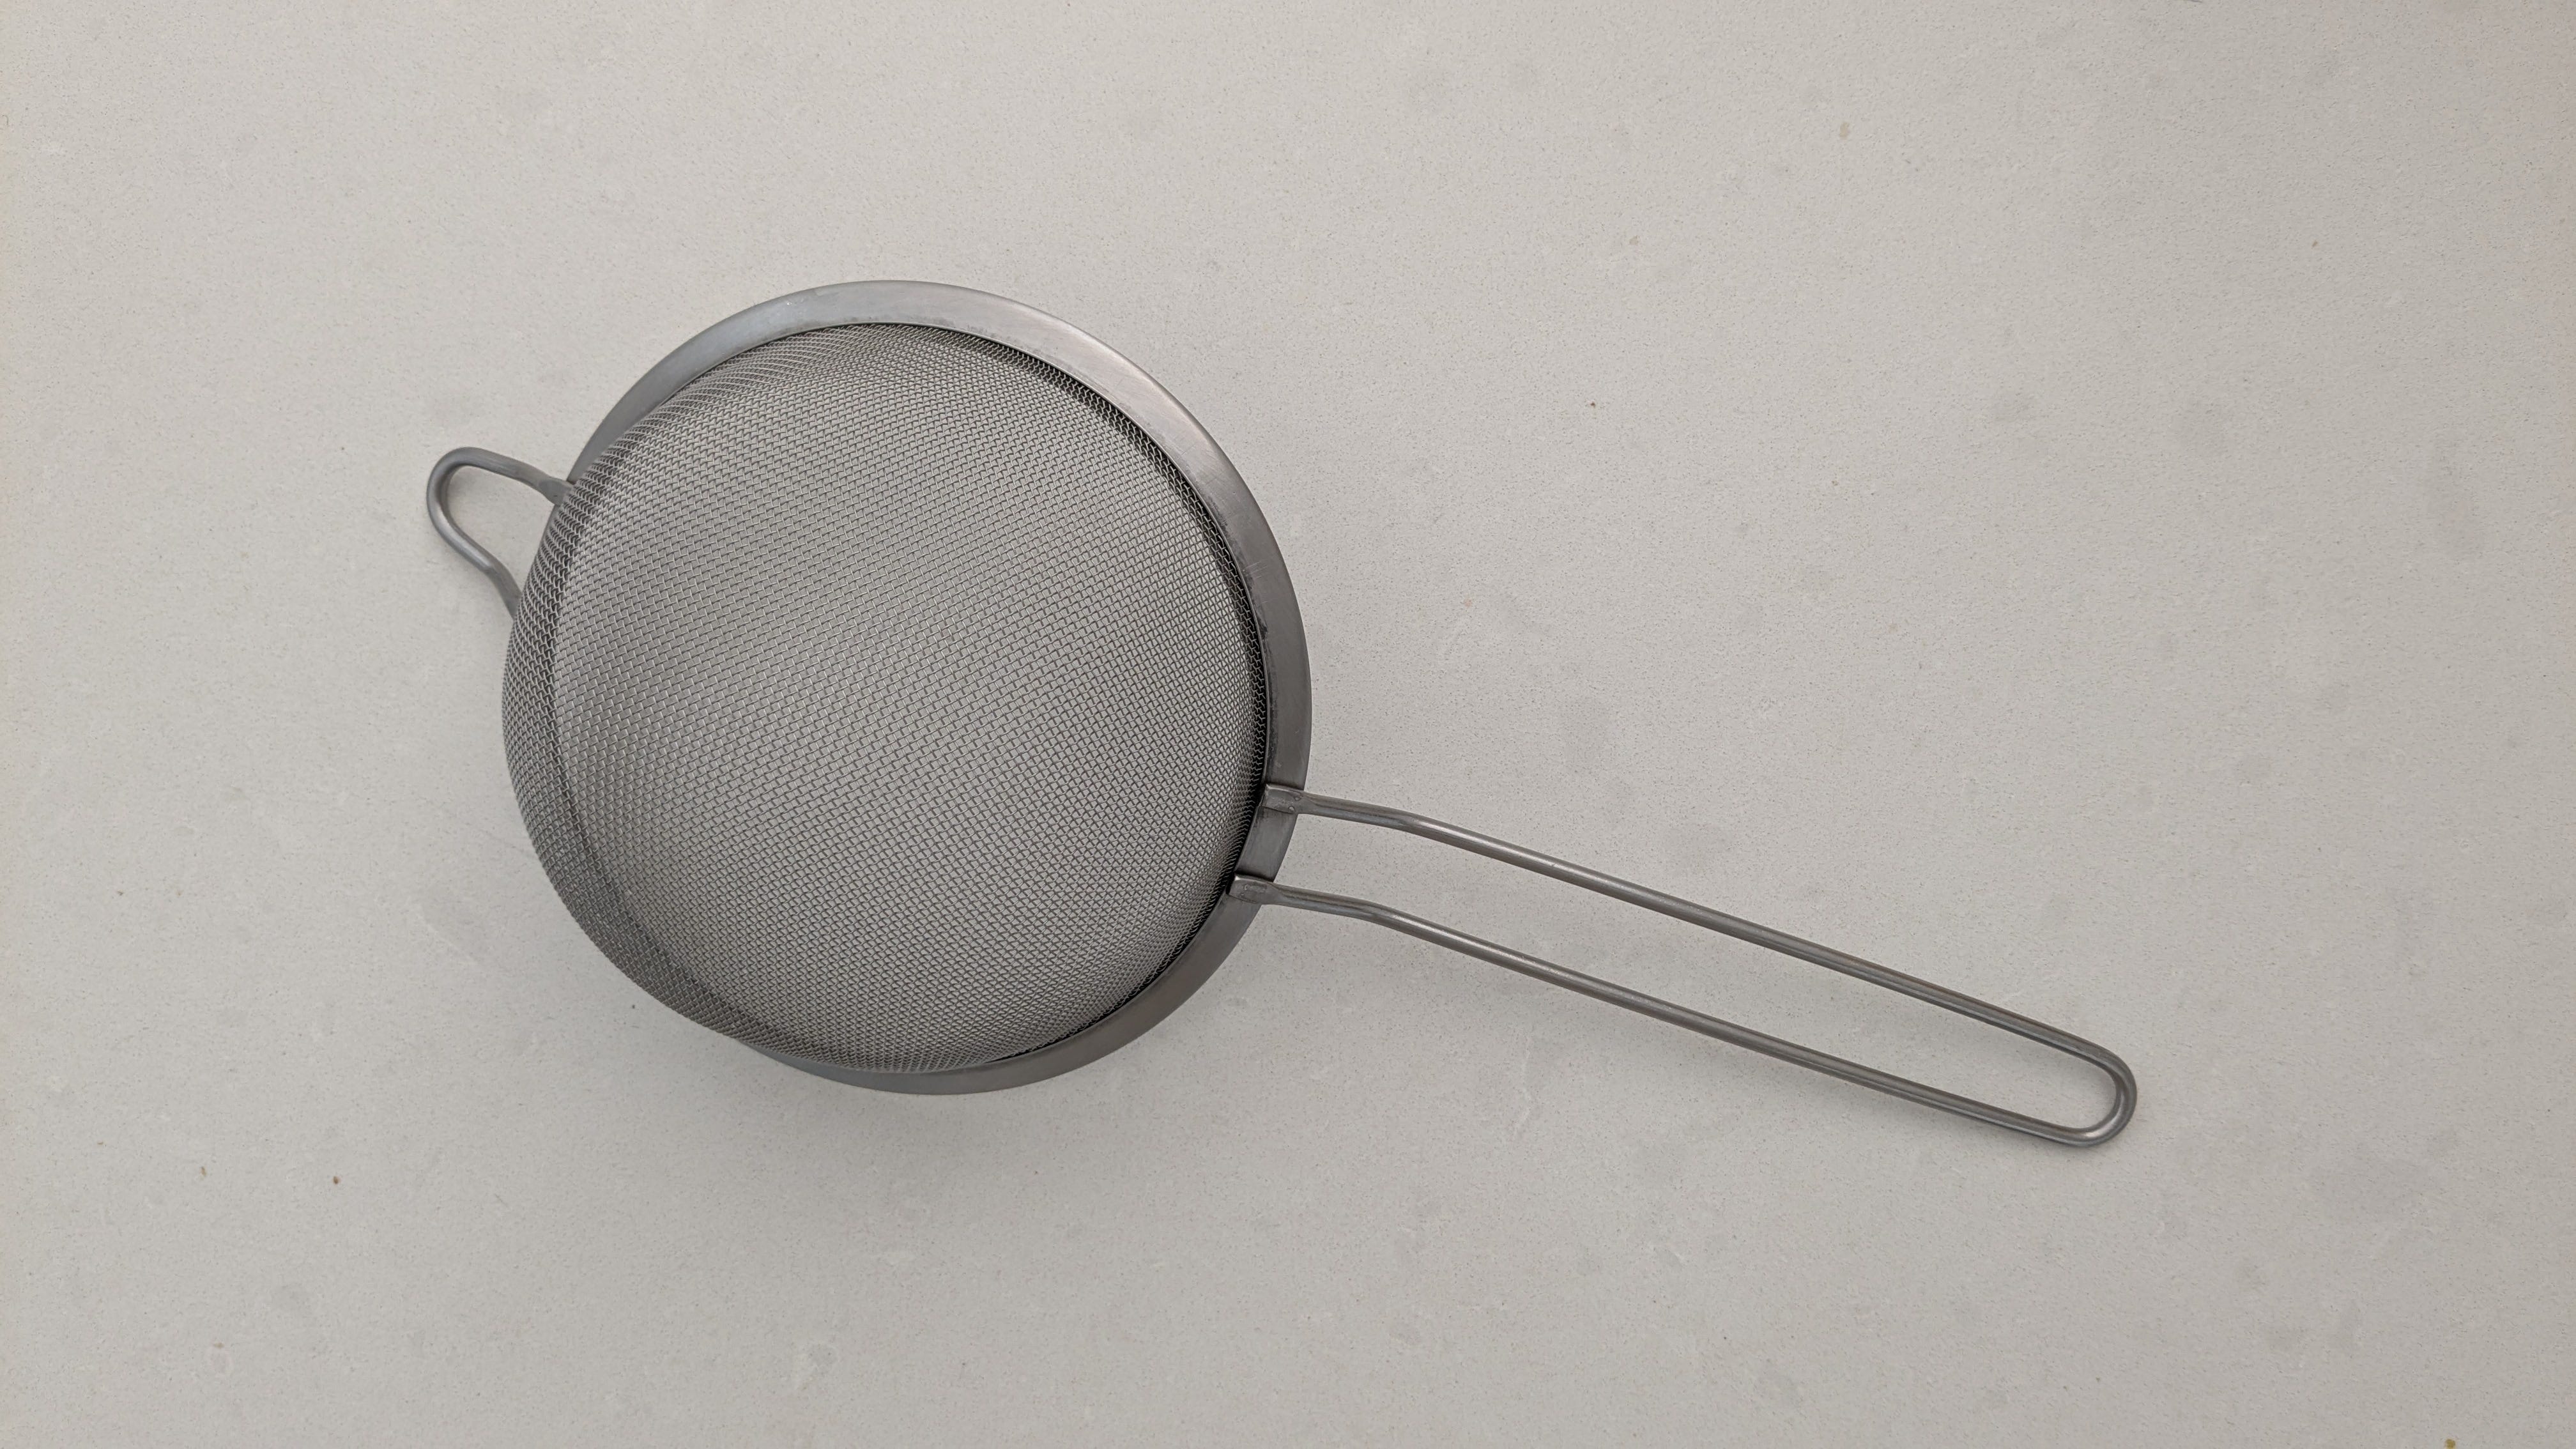
Honestly, I personally was annoyed when I had to buy a sieve, but it’s something I’m always very happy to have when I need it. It allows you to sift and aerate flour, which is especially useful if you’re making a light sponge. You can use it to strain fresh citrus juice, infused oils or milk/cream, sauces, custard, the list is long. If you want smooth textures, the fine mesh sieve is your friend. Plus, you can use it for dusting icing sugar or cacao on cakes and desserts for some basic decoration. I suggest getting a higher-quality one that’s made entirely of metal—every time I have opted for a cheaper model I regretted it: the mesh easily separates from the outer frame and some might even rust.
9. Rolling Pin
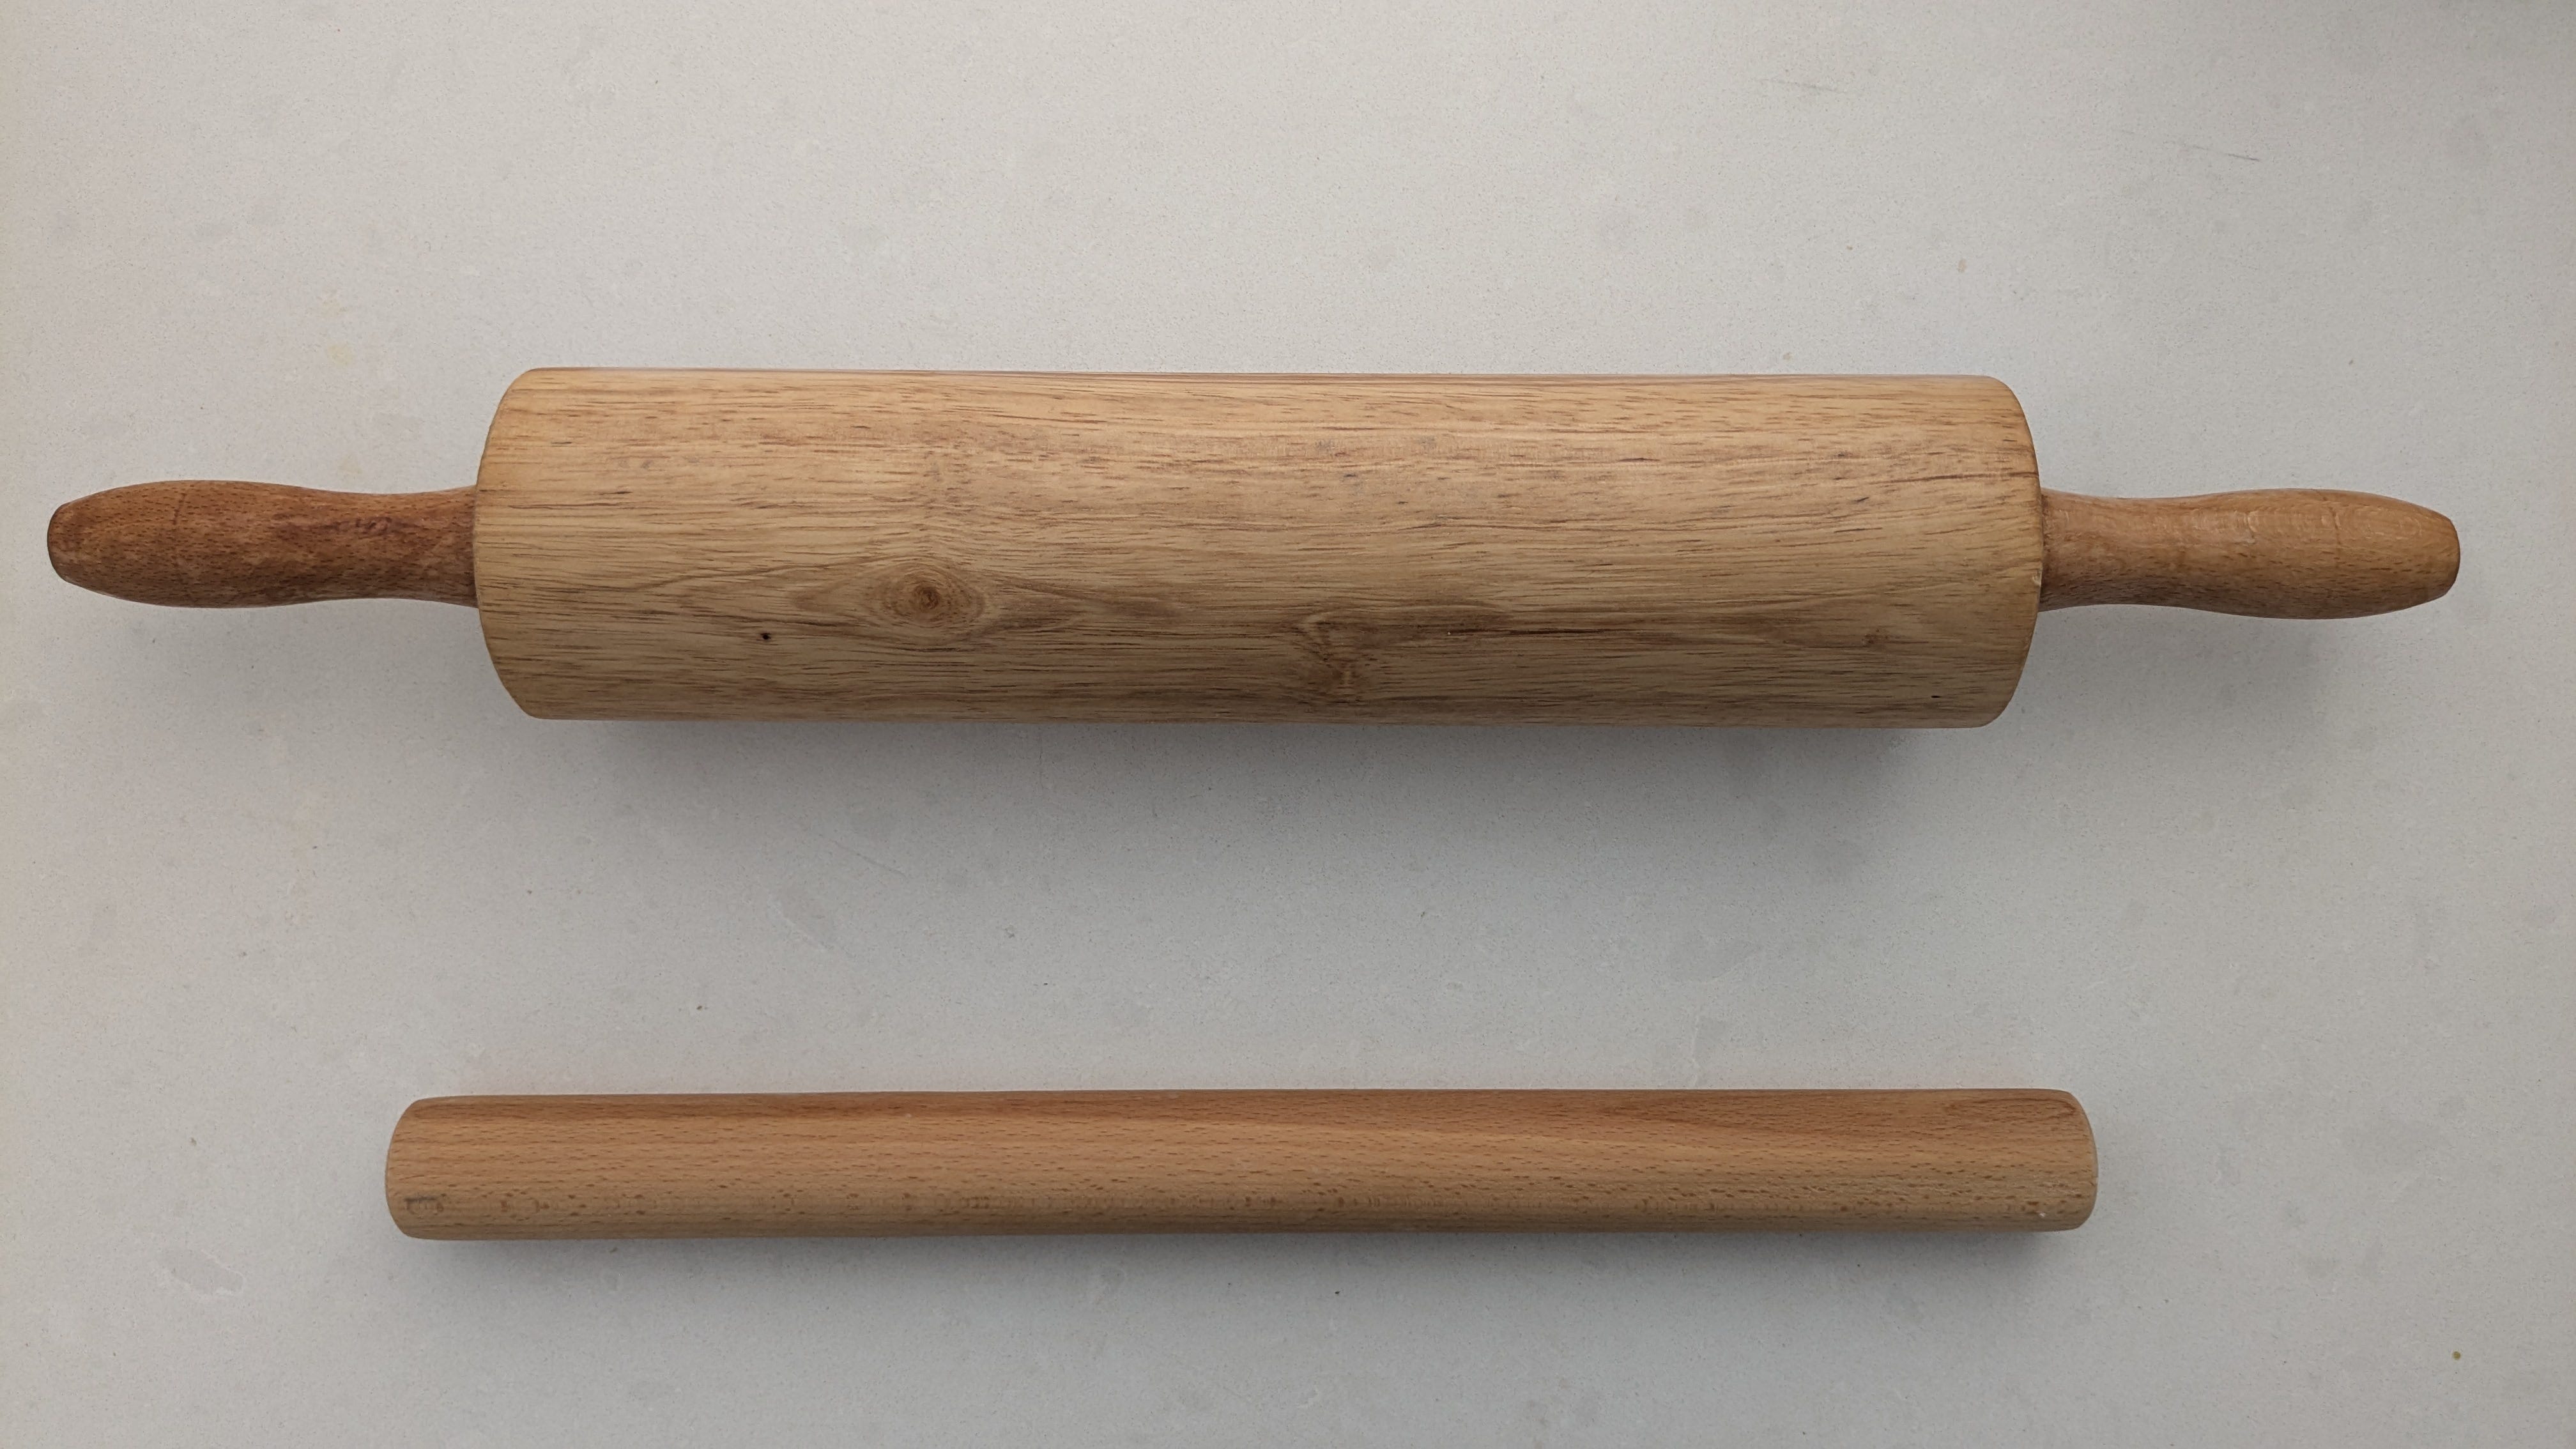
If you want to make pies, tarts, galettes, filled rolls or certain types of cookies and pastries, there’s no way around a rolling pin. There are different types of rolling pins, but I’d say the two types you see most often are the straight rolling pin and the handled rolling pin. I have and use both, depending on what I want to roll out. I find the straight rolling pin gives you a bit more control for even thickness, but handled rolling pins do the job just fine. I don’t recommend tapered rolling pins (also called French rolling pins) for beginners, because they need some getting used to. I’d suggest sticking to wood as the material for your rolling pin because it’s lightweight, fairly easy to take care of and has the added bonus of not conducting heat (so that pie crust stays nice and cold when you roll it out). Make sure to get the appropriate size for your baking projects.
10. Zester
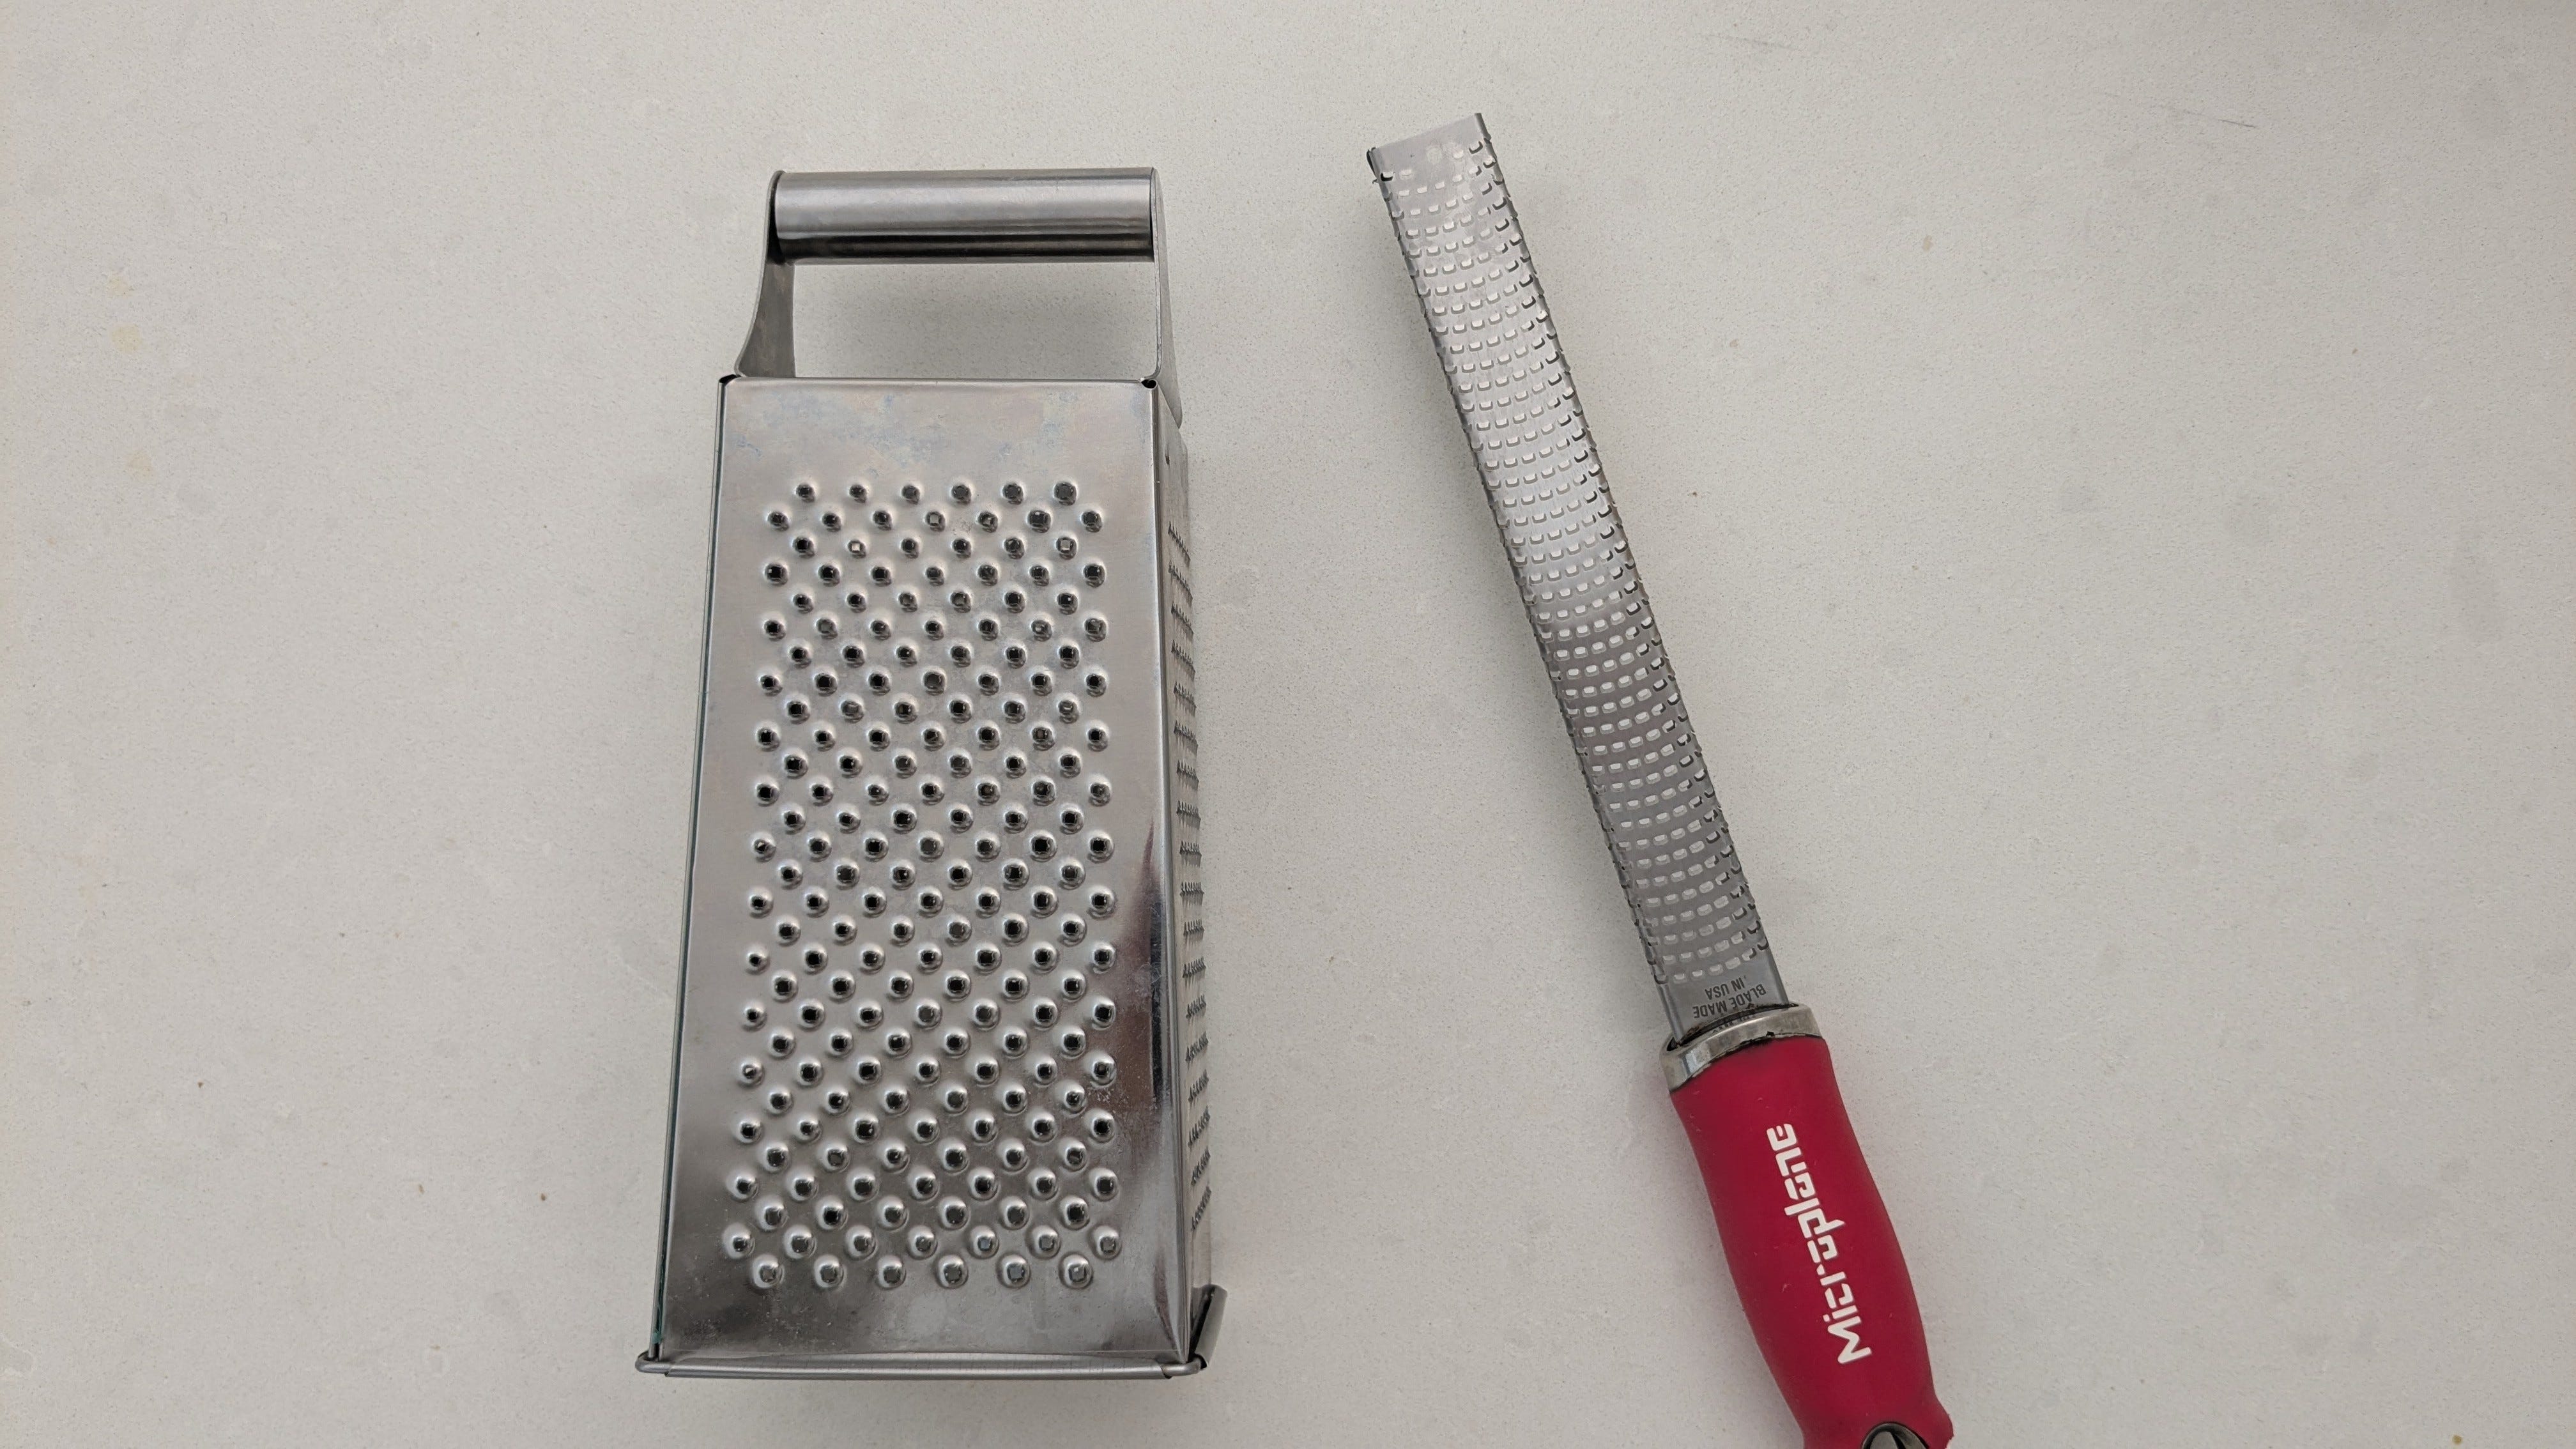
Citrus zest is one of my absolute favorite ingredients in baking and I use it in most of my recipes. It’s a great way to add brightness and citrus flavors to any batter or dough, without adding more liquid. But: no zest without a zester. You don’t have to buy a microplane (which most professionals use), a cheaper one, or even a box grater, will do just fine. And once you have a zester, you can use it for other things as well, such as finely grating cheese or decorating baked goods with grated nuts, grated chocolate or, well, fresh zest.
With these 10 baking essentials, you’ll be set for getting started and making all types of delicious things: cakes, quick breads, cookies, pies, pastry cream, meringue and much more. Plus, you’ll be able to try and practice different techniques and most of all: have lots of fun baking.
great post! would also suggest for german bakers, investing in baking sheets that don't come with your oven. at least for me, the one that came with my oven has high walls and is really dark in colour, which can transfer more heat than you want for cookies, for example.